Loading...
Loading...
Shield of Sacrifice
April 11, 2026 at 09:18 PM
Add southern empty-cave walkthrough and 2H-build defense math from video guide
The Shield of Sacrifice is a shield in Crimson Desert with a base Defense of 6 and two preset Abyss Gear cores already installed: Defense +3 and Guard Stamina Cost -3.0%. Hidden inside an unmarked sea cave, this shield rewards exploration and offers the highest effective defense among the mobility-class shields when its preset cores are factored in.
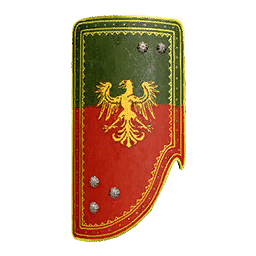
Unlike the Mirror of Night and Shield of Radiance, the Shield of Sacrifice does not provide a movement speed bonus. Instead, it leans entirely into survivability. The combination of 6 base defense, a +3 defense core, and reduced guard stamina cost makes it one of the most efficient blocking tools available in the mid-game. Players who prefer to stand their ground and tank hits will get more mileage out of this shield than those who rely on dodging.
Attribute | Value |
|---|---|
Equipment Type | |
6 | |
+0 | |
+0 | |
+0 | |
Abyss Core Slots | 2 (preset) |
Refinement Levels | 10 |
Sell Price | 6.91 Silver Coins |
Core Slot | Effect |
|---|---|
Slot 1 | Defense +3 |
Slot 2 | Guard Stamina Cost -3.0% |
The preset cores bring the shield's effective defense to 9 (6 base + 3 from the core), which puts it on par with much heavier shields while maintaining a smaller profile. The Guard Stamina Cost reduction means each block drains slightly less of your stamina bar, letting you sustain a defensive posture for longer stretches during boss fights and group encounters.
The Shield of Sacrifice is hidden inside an unmarked sea cave located southeast of the Abandoned Seaside Cabin along the coast. The cave entrance does not appear on the map, so you need to follow the shoreline and look for an opening in the cliff face.
Enter the cave and head to the right side of the chamber. A treasure chest there contains the Shield of Sacrifice. There are no enemies inside the cave, but the entrance can be hard to spot because it sits below the normal sightline when walking along the coastal path. Try approaching from the waterline and scanning the cliff wall for the opening.
This shield cannot be purchased from merchants or crafted at a blacksmith. It is a one-time find, so selling it means losing it permanently on that character.
The Shield of Sacrifice has ten refinement levels. Refining it at a blacksmith increases its base defense further, stacking on top of the +3 defense core that comes preinstalled. Because the core bonus is additive with the refined base stat, each refinement level effectively counts for more on this shield than on one without a defense core. Early levels cost only Silver and common ores, making the first few upgrades highly cost-effective.
The Shield of Sacrifice is hidden deep in the southern portion of the world map. The cave that contains it is almost completely empty: no enemies, no mini boss, and no additional loot beyond the chest itself. This makes it one of the easiest top-tier shields to pick up if you are willing to make the trip south.
Open your world map and look at the far southern edge. The cave sits well below the main questing corridor, so you will likely need to fast travel to the nearest southern waypoint and then ride the rest of the way. The cave entrance is set into a cliff face and is easy to miss if you do not angle the camera correctly. Scan along the coast and look for the opening.
Once inside, the layout is trivial. There is a single chamber with nothing else in it. Walk up to the chest, open it, and collect the Shield of Sacrifice. Because the cave is empty, you do not need any particular gear or level to make the pickup safely.
The Shield of Sacrifice is one of the go-to picks for two-handed weapon builds, alongside the North Wind Shield. When you wield a two-handed weapon such as a great sword or halberd, your shield rides on your back instead of being actively guarded. It is not purely decorative in that state: the shield's defense value still feeds into your character's total defense. That is the core reason players continue to equip a shield at all while running 2H.
The important caveat is how sockets behave in the back-slot state. Only defense-type sockets stay active. Offensive sockets such as attack or critical rate go dormant because the shield is not your active guard tool. So for a 2H build you want whichever Large Shield has the highest raw defense number once fully refined and double-socketed with defense cores. A round shield, or a shield with attack sockets, is a straight downgrade here because the offensive stats never fire.
Large shields top out at 31, 29, or 27 defense once you hit Max Refinement (+10) and add two defense sockets. The Shield of Sacrifice sits at the 31 ceiling together with the North Wind Shield, which makes the two of them the preferred raw-value picks for 2H users. Round shields generally have significantly lower defense, so they do not compete at this tier.
If you only care about the numbers and do not mind the way the shield looks strapped to your back, the Shield of Sacrifice and the North Wind Shield both deliver the same top-end 31 defense. Some players think both of these models look unattractive, which is why the visually cleaner Shield of Conviction (white variant) and Shield of Betrayal (black variant) are common alternatives for a 2H loadout despite sitting at a slightly lower tier. The max defense ceiling is what matters for the math; the aesthetics are a personal call.
If you are planning a Two-Handed Weapons build, grab whichever of the two raw-defense shields is closer to your current chapter progression. The Shield of Sacrifice in the south and the North Wind Shield west of Paloon are roughly equivalent in raw value, so travel distance is usually the deciding factor. Reaching the cave, clearing the empty chamber, and collecting the chest takes only a few minutes once you are in the area.
With 9 effective defense (6 base + 3 from the core), the Shield of Sacrifice can absorb hits that would chip through lighter shields. Use it when you expect to face enemies with heavy, slow attacks where blocking is more practical than dodging
The Guard Stamina Cost -3.0% reduction is subtle but adds up across a long fight. It means you can block one or two more hits before your stamina runs out compared to a shield without this bonus
Pair the Shield of Sacrifice with a high-damage one-handed weapon like the Wells Mace or Silver Wolf Axe for a tanky, hard-hitting loadout
Because this shield has no movement speed bonus, you will feel slower than with the Mirror of Night or Shield of Radiance. Compensate by using Abyss Gear on your armor or weapon that adds movement speed if you need more agility
The preset cores cannot be removed or swapped, so what you see is what you get. If you want full control over your core loadout, consider using a different shield with empty slots instead
Shield | Speed | Cores | Source | |
|---|---|---|---|---|
4 | Move Lv. 2 | 2 empty | Crafted / Sanctum | |
5 | Move Lv. 2 | 2 empty | Hidden (Verdant Paradise) | |
Shield of Sacrifice | 6 | +0 | DEF +3, Stamina -3% | Hidden (Sea Cave) |
6 | +0 | Varies | Quest / Loot | |
8 | +0 | Varies | Quest / Loot |
Mirror of Night (mobility-focused, craftable)
Shield of Radiance (balanced defense and speed)