Loading...
Loading...
Alchemy
April 17, 2026 at 11:53 AM
Add Image column to 2 table(s) with 4 matched icons
Alchemy in Windrose provides potions and elixirs that offer instant healing, temporary stat boosts, and combat advantages. While cooking provides sustained buffs over time, alchemy delivers immediate, powerful effects. The alchemy system is unlocked through exploration and uses rare ingredients found on later islands. In tough fights, potions are often the difference between victory and defeat.
The Alchemy Table is not available from the start. It unlocks when you discover your first Misty Orchid, a rare plant found on the second island. Picking up the Misty Orchid triggers a recipe unlock notification and adds the Alchemy Table to your building menu. This discovery-based progression is consistent with how Windrose handles all new recipes: find the ingredient, get the recipe.
The Alchemy Table is a crafting station that must be placed within Bonfire range and under a roof. Unlike the Cooking Fire, which can be placed anywhere outdoors, the Alchemy Table has strict placement requirements. Plan your base layout to include an enclosed room or covered area for alchemy.
To build the Alchemy Table, you need basic construction materials available by the time you reach the second island. Once placed, it provides access to all unlocked potion and elixir recipes. New recipes are unlocked as you discover new alchemy ingredients throughout the archipelago.
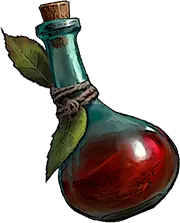
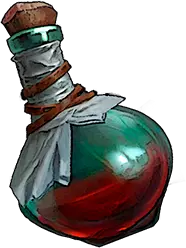
Potions provide immediate, powerful effects. They are consumed instantly from your hotbar during combat.
Image | Potion | Ingredients | Effect | Notes |
|---|---|---|---|---|
| Minor Healing Potion | Misty Orchid, basic herbs | Instantly heals 40% health | First potion unlocked; reliable combat healing |
| Healing Potion | 15 Healing Herbs | Instantly heals 75% health | Requires bulk herb gathering |
Weak Healing Potion | Glowing Blue Flowers | Small instant heal | Made from renewable cave flowers | |
Strong Healing Potion | Rare Red Plant | Large instant heal | Rare plant is a one-time find per location |
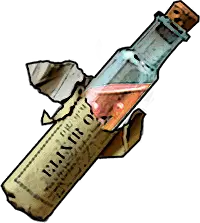
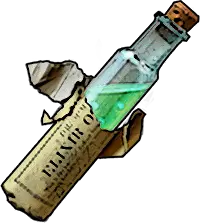
Elixirs provide temporary combat buffs rather than healing. They last for a set duration and enhance your offensive or defensive capabilities.
Elixir | Effect | Duration | Best Used For |
|---|---|---|---|
Elixir of Firm Hand | +10 melee damage | 15 minutes | Boss fights, dungeon clearing |
The demo included a limited selection of elixirs. Additional elixir recipes are expected to become available in the full Early Access release as more ingredients and islands are added.
Alchemy ingredients are rarer than cooking ingredients and require deliberate exploration to find. Some are renewable, while others are one-time discoveries.
Ingredient | Location | Renewable? | Notes |
|---|---|---|---|
Misty Orchid | Second island, specific locations | Limited | First one unlocks Alchemy Table |
Healing Herbs | All islands, growing in environment | Yes | Most common alchemy ingredient; also used in cooking |
Glowing Blue Flowers | Inside caves and dark areas | Yes | Emit a humming sound; regrow after harvesting |
Rare Red Plant | Ruins and camps, second/third islands | No | One-time find per location; used for strongest potions |
Glowing Blue Flowers are the most reliable alchemy ingredient. They glow visibly in dark caves and make a distinct humming sound when you are nearby. Use audio cues to locate them in deeper cave sections where visibility is low.
Alchemy and cooking serve complementary roles. Understanding when to use each system is key to efficient survival.
Aspect | Cooking | Alchemy |
|---|---|---|
Effect Type | Sustained buffs over time | Instant effects |
Duration | 7-30 minutes | Instant (potions) or 15 min (elixirs) |
Best For | Pre-fight preparation, stat stacking | Emergency healing, burst damage boosts |
Ingredient Rarity | Common to uncommon | Uncommon to rare |
Crafting Station | Cooking Fire (portable) | Alchemy Table (requires roof and Bonfire) |
Stacking | 2 food + 1 drink active | Can stack with food buffs |
The optimal approach for boss fights is to eat two strong foods before the encounter (e.g., +10 STR and +10 VIT) and carry healing potions and an Elixir of Firm Hand for use during the fight. Food provides the baseline stat boost, while potions handle emergencies.
The Doctor NPC at your settlement provides free healing potions every in-game hour. This is a renewable source of healing potions that does not require any ingredients. The Doctor is available once your base has progressed enough to attract NPCs. Visiting the Doctor regularly and stockpiling free potions before difficult content is one of the most efficient preparation strategies in the game.
The recommended alchemy progression follows this path:
Reach the second island and find a Misty Orchid to unlock the Alchemy Table
Build the Alchemy Table in a roofed area at your base within Bonfire range
Craft Minor Healing Potions using the Misty Orchid recipe for your first reliable combat healing
Explore caves for Glowing Blue Flowers to craft Weak Healing Potions as a supplement
Gather Healing Herbs in bulk (15 per Healing Potion) for stronger healing
Craft Elixir of Firm Hand before boss fights for the damage boost
Search ruins and camps on later islands for Rare Red Plants to unlock Strong Healing Potions
Always carry at least 3 healing potions before entering a dungeon. Boss fights drain health fast.
Listen for the humming sound in caves. It means Glowing Blue Flowers are nearby.
The Doctor's free potions restock every in-game hour. Set a reminder to visit between exploration runs.
Healing Herbs are used in both cooking and alchemy. If you are short on herbs, prioritize potions over food since potions save you in emergencies.
Bandages from your inventory heal over time, while potions heal instantly. Use bandages between fights and save potions for mid-combat emergencies.
Alchemy potions and food buffs stack. Use both systems together for maximum effectiveness.
Every higher-tier alchemy product rests on the Alchemical Base, which is the gateway craft of the Alchemy Table. Understanding the chain prevents frustration when a potion recipe is greyed out even though you have the listed reagents.
Alchemical Base = 1 Clay Bottle + 1 Misty Orchid. Crafted at the Alchemy Table. Many recipes consume one Alchemical Base per potion, so stockpile five to ten whenever you return to base.
Minor Healing Potion = 1 Alchemical Base. Your first reliable in-combat heal; restores a portion of health instantly.
Healing Potion = 1 Alchemical Base + 3 Healing Herbs. Bigger heal, better for boss fights.
Great Healing Potion = 1 Alchemical Base + 3 Healing Herbs (higher-tier recipe unlocked later). Restores roughly 75% to 80% of health on use.
Elixirs = Alchemical Base plus a reagent specific to the elixir (Sulfur, a cooked food item, a flower, or a foraged herb, depending on the recipe).
Image | Recipe | Effect | Duration | Notes |
|---|---|---|---|---|
| Elixir of Firm Hand | +10 Melee Damage | 15 minutes | The demo-era standby; still a core pre-boss buff |
| Elixir of Precision | +13% Ranged Damage | 15 minutes | Slots into the drink buff slot alongside food; ideal for firearm builds |
Dead Eye Grog | +15% damage (all sources) | 30 minutes | One of the longest-duration buffs in the game; drink it before difficult boss runs or extended dungeon dives |
Elixirs and grogs occupy the drink slot of the bottom-left buff row. They stack with cooked food buffs, so a typical boss-prep loadout is two food items (for +vitality and +endurance or +strength) plus a Dead Eye Grog or Elixir of Precision for the damage push. See Food and Potions for how the three slots interact.
Alchemy ingredients are tied to specific islands and biomes, which means efficient potion stockpiling is really a hunting route plan. Use fast travel bells and a light inventory to rotate through these spots between other quests.
Ingredient | Source | Notes |
|---|---|---|
Grows on islands two and three; prefers open grassy areas and coastal edges, glowing visibly at dusk | First pickup unlocks the Alchemy Table schematic; renewable but respawn is slow | |
Grows on every explored island; also drops from chest farms in ancient ruins and drowned-tier dungeons | Shared ingredient with cooking; prioritise potions if you are short | |
Glowing Blue Flowers | Inside caves, usually the middle portion of the cave before the loot room | Emit a distinct humming sound; follow the audio cue in the dark |
Clay | Mudbank and shoreline deposits on most islands | Converted into Clay Bottles at the Workbench |
Sulfur | Foothills only; mined with the Iron Pickaxe after the Workbench Tier 2 upgrade | Required for firearms and the late-game Reagent Table upgrade |
Rare Red Plant | One-time find at ruins and pirate camps on islands two and three | Feeds the strongest healing potion recipe; do not waste |
Like the Workbench and Weaponsmith, the Alchemy Table has companion upgrades that raise its tier. Each new tier unlocks additional elixir and grog recipes.
Upgrade | Cost | Unlocks |
|---|---|---|
Stove and Pot | 5 Stone + 5 Clay + 1 Copper Pot | First tier of elixirs; the Firm Hand recipe lives here |
Distiller | 5 Mire Metal Ingot + 5 Wood + 2 Crocodile Hide Piece | Unlocks alcohol-based grogs including Dead Eye Grog; requires access to the swamp biome |
Reagent Table | 5 Hardwood + 2 Rum Bottle + 2 Silver Ingot + 2 Sulfur + 1 Ironware | End-game recipes; Sulfur and Rum are the gating materials |
The Alchemy Table has a worker slot, accessed from the bonfire workers panel once a crew member is hired. Rosalinda Merca, available in Tortuga for roughly 500 piastres, is the premier alchemy assignment. She is a Master Bottle Maker: double Clay Bottle production on any recipe that crafts them and a 30% chance to craft an extra elixir on every successful elixir recipe. Given how expensive Elixirs and grogs are to restock, she essentially cuts your reagent spend on buffs by a third.
Return to base and empty your inventory into chests using the Q and X Deposit Similar shortcuts.
Craft five to ten Alchemical Bases (one Clay Bottle + one Misty Orchid each).
Craft Minor Healing Potions until you have at least ten; swap to Healing Potion or Great Healing Potion if your Healing Herb stockpile supports it.
Craft one Elixir of Precision or Dead Eye Grog if you plan to fight a boss or clear a large dungeon; these slot into your drink buff slot at the same time as food.
Talk to Doctor Galen at the base bonfire; he hands out free potions every in-game hour.
Carry three to five healing potions, one grog or elixir, and five bandages out with you.