Loading...
Loading...
T'rukan the Ascended
April 6, 2026 at 12:09 PM
Added NPC portrait image
T'rukan the Ascended is a World Boss and mandatory story encounter in Crimson Desert. He appears during the True Strength quest (Quest 129), the culminating fight of Chapter 9: The Sage of the Desert. The battle takes place in the Serpent Marsh region of South Demeniss, at the location where the player earlier repaired the first pensive statue.
T'rukan is described as a monk who has transcended ordinary physical limits, relying on true strength above all else. He wears a leopard mask and fights entirely unarmed, channeling powerful spectral energy through his body to augment his strikes. This combination of raw martial speed and supernatural force makes him one of the most dangerous bosses in the main campaign.
With 4,116 HP and 265 Attack, T'rukan hits harder than most bosses players have encountered up to this point in the story. He operates as a single-phase fight with no distinct transitions, but his speed and attack patterns increase in ferocity as he takes damage, particularly below 30% HP. He is classified as a Boss Large Human enemy type and carries the passive skill of the same name, which governs his behavioral patterns as a large humanoid combatant.
Attribute | Details |
|---|---|
Name | T'rukan the Ascended |
Type | World Boss |
Classification | Boss Large Human |
Weapon | None (unarmed) |
Quest | True Strength (Quest 129) |
Chapter | Chapter 9: The Sage of the Desert |
Location | Serpent Marsh, South Demeniss |
Skill | Boss Large Human (Passive) |
T'rukan has high offensive stats with no defensive value, reflecting his playstyle as a purely aggressive brawler. His 4,116 HP is substantial, but his defining characteristic is his 265 Attack, one of the highest base Attack values among story bosses. The 0 Defense means he takes full damage from all player attacks, but his speed and relentlessness mean that trading blows with him is rarely a winning strategy. His Knockout threshold of 750 sets a high bar for stunning him.
Stat | Value |
|---|---|
HP | 4,116 |
Attack | 265 |
0 | |
100 | |
Knockout | 750 |
Fatal | 5 |
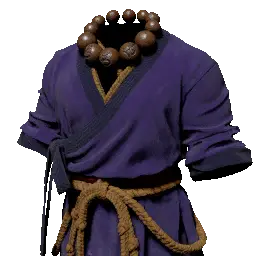
T'rukan wears a full set of named Trukan equipment. Despite fighting unarmed, he is dressed in traditional cloth armor and boots, consistent with the aesthetic of a disciplined martial monk. The Wooden Mask of Lost Justice serves as his helm and is one of the notable rewards players receive upon defeating him, as it drops as a quest reward from the True Strength quest.
Item | Slot |
|---|---|
Upper Body | |
Cloak | |
Hands | |
Feet | |
Helm |
T'rukan is found in the Serpent Marsh, an area in South Demeniss reached during Chapter 9. The questline leading to his encounter begins after the player navigates the island to the south of Demeniss and enters a temple, where they meet the Chief Monk. The monk tasks the player with restoring pensive statues throughout the area. After completing the prior step, Path of the Disciple, the True Strength quest triggers the confrontation with T'rukan at the site of the first restored pensive statue. A cutscene plays automatically before the fight begins.
T'rukan is a fully unarmed combatant who fights with his fists, feet, and channeled spectral energy. His attacks are exceptionally fast, chain together into long combinations, and are difficult to interrupt. Unlike earlier bosses where aggressive counterplay is viable, T'rukan punishes overcommitment severely. Learning to recognize his telegraphs is the key to surviving the encounter.
T'rukan's primary offensive tool is a rapid sequence of punches and kicks chained together into extended combinations. These combos come out fast with very little downtime between individual hits. Attempting to block the full sequence will quickly deplete stamina due to his high Attack stat. The correct response is to dodge through each strike and wait for the combination to end before moving in to counterattack.
When a large spectral figure appears behind T'rukan, his next attacks will be exceptionally hard-hitting. This visual cue telegraphs a burst of three consecutive strikes, each one capable of dealing serious damage. Players must execute three consecutive dodges to avoid all of them. Attempting to block any of these attacks is strongly discouraged due to their amplified damage.
T'rukan crouches low before unleashing a wide, long-distance sweeping kick that covers significant ground in front of him. The low crouch is the only warning. Players who see this animation must dodge immediately, as the kick has a deceptively large range and can catch those who are mid-attack or late to react.
T'rukan fires two purple energy bolts from his hands. The bolts have weak tracking and can be dodged sideways as they appear. He immediately follows the projectile volley with either a lock-on kick or a palm strike, so players who dodge the bolts must also dodge the immediate melee follow-up.
Periodically, T'rukan slows down and glows purple before summoning a spirit. During this phase, he fires volleys of purple projectiles that can be blocked while simultaneously healing. Players who are running low on health can use this window to consume healing items, but should remain mobile to avoid the projectile spread.
The core principle of fighting T'rukan is patience. He is not a boss that rewards constant aggression. Wait for him to complete an attack sequence, dodge through the full combination, and then land one to two hits during his recovery window before backing off. Each opening should be used for a small burst of damage rather than an extended attack chain. Greedy play leads to getting caught by his next combo before it finishes.
Blocking is largely ineffective against T'rukan. His 265 Attack stat means that even blocked hits drain stamina quickly, and his Spectral Burst sequence hits hard enough to break through stamina reserves entirely. Focus on dodging as the primary defensive tool throughout the fight. Maintain enough stamina reserve for at least three consecutive dodges at all times to handle the Spectral Burst.
T'rukan's most dangerous attacks are clearly telegraphed. The spectral figure appearing behind him signals the three-hit Spectral Burst. The low crouch warns of the Sweep Kick. React to these visual cues immediately rather than waiting to see the attack develop. Reacting late to either telegraph is usually fatal at lower gear levels.
The safest attack windows open after T'rukan finishes a multi-hit combination. His recovery animation after longer flurries is brief but consistent. Use heavy attacks or charged strikes during these windows for maximum damage efficiency. Keeping attack commitments short means you will always have stamina ready for the next incoming combo.
T'rukan is highly susceptible to Sleep Arrows, available from merchants or craftable through the alchemy system. A single Sleep Arrow causes him to collapse to the ground, leaving him completely vulnerable to free damage for the duration of the sleep effect. Players who stock up on Sleep Arrows can defeat T'rukan with minimal engagement in standard combat. Two well-placed Sleep Arrows are enough to end the fight entirely.
A minimum of Level 6 Health (750 HP) is recommended before engaging T'rukan. Without this threshold, several of his attacks can kill in a single combination. Level 6 or higher gear refinement with Damage Reduction emphasis is the most impactful gear stat for this fight. The Tauria Curved Sword is frequently recommended as the primary weapon due to its heavy attacks generating high stagger per hit.
Category | Recommendation |
|---|---|
Upgrade the Health skill to at least Level 6 for a minimum of 750 HP. Many of T'rukan's attacks can one-shot players below this threshold. | |
Equip Level 6 refined armor. Strengthen at an Anvil and Grindstone for additional Damage Reduction before the fight. | |
Weapon | The Tauria Curved Sword is recommended for its high stagger output on heavy attacks, which helps interrupt T'rukan's rhythm during openings. |
Healing Items | Bring at least 100 healing food items. Chewy Rice Cakes or Hearty Soups that restore both health and spirit are ideal. For a fight this demanding, 200 is a safe supply. |
Equip gear with Spirit regeneration. The Crow's Pursuit accessory, which restores Spirit on hit, helps maintain offensive pressure during T'rukan's openings. | |
Sleep Arrows | Optional but extremely effective. Even one Sleep Arrow gives a free damage window. Stocking several can trivialize the encounter entirely. |
Completing the True Strength quest by defeating T'rukan grants the following rewards. The Wooden Mask of Lost Justice is the most notable drop, as it is the same helm T'rukan wears in the fight.
Reward | Type |
|---|---|
Special Item | |
Never attempt to block the Spectral Burst sequence. The three-hit burst will drain stamina and connect regardless. Dodge all three hits in succession.
The low crouch before the Sweep Kick is the single most important telegraph to learn. Dodging the moment the crouch begins avoids the full kick.
After T'rukan fires purple bolts, dodge sideways to avoid the projectiles, then immediately prepare to dodge again for the melee follow-up.
During the Spirit Summon phase when T'rukan glows purple and fires projectile volleys, use the time to consume healing items while staying mobile.
T'rukan's behavior becomes slightly more erratic below 30% HP. Stay more conservative with attack windows during this phase.
Sleep Arrows are available and extremely effective. Using one at the start of the fight front-loads a significant amount of free damage.
If the Tauria Curved Sword is not available, prioritize any weapon with high stagger per hit. Building T'rukan's Knockout bar creates extended damage windows.
Bring more healing food than seems necessary. T'rukan's 265 Attack means even a few unblocked hits can bring a player close to death.