Bosses
A comprehensive guide to Anomaly Boss encounters in Neverness to Everness, covering the break and stagger system, combat strategies, team composition, co-op coordination, rewards, and the full directory of all 13 launch bosses with their categories, locations, and elemental weaknesses.
On This Page
Anomaly Bosses are powerful enemies encountered during Anomaly Commissions and other endgame content in Neverness to Everness. Each boss has a unique design and backstory that sheds light on the complex history of Hethereau and its supernatural underbelly. These encounters serve as the toughest solo and co-op challenges in the game, testing a player's mastery of the combat system, team composition, and defensive timing. Defeating them rewards players with unique Arcs, progression materials, and other valuable loot tied to each boss's difficulty tier.
Break and Stagger System
Every Anomaly Boss has a break meter, visible as a white bar beneath their health. The stagger system is central to defeating them efficiently. Every hit a player lands fills the break meter by a small amount. Successful dodges and clean parries fill it significantly more, rewarding precise defensive play. Parry is always the higher-reward choice when the timing window allows it; dodging is the safer fallback when positioning is awkward or the attack animation is hard to read.
Once the break meter reaches its maximum, the boss enters a vulnerable stagger state. During this window, the boss cannot act and takes massively increased damage. This is the key burst window where players should unleash their strongest abilities and ultimate attacks. Coordinating stagger timing with teammates in co-op is the difference between a smooth clear and a drawn-out fight. Saving ultimates, heavy skills, and reaction payoffs for exactly this moment is the core of efficient boss combat.
Discord Reaction and Break Synergy
The elemental reaction system ties directly into the stagger plan during boss fights. The Discord reaction, which triggers when both Nova and Scorch are active on the same target simultaneously, reduces a percentage of the enemy's break meter. This makes Discord one of the fastest paths to forcing a stagger. Nova is produced by the Chaos and Psyche attribute overlap, while Scorch comes from the Incantation and Chaos overlap. Because both reactions share the Chaos attribute, teams built around Incantation, Chaos, and Psyche characters can apply Scorch first, swap to trigger Nova, and let Discord chip away at the break bar while the team continues to deal damage.
This synergy means that trio reactions are valuable for raw damage and serve a structural role in reaching stagger windows faster.
Esper Cycle Interaction
The Esper Cycle System plays an important role in boss encounters. Normal attacks charge the Esper Cycle Meter steadily, while skills accelerate the charge further. A successful parry, however, instantly fills the Esper Cycle Meter. This means that players who parry consistently during boss fights gain access to faster team rotations and more frequent ultimate usage, creating a compounding advantage over the course of the encounter.
Building a team that can both fill the break meter quickly and capitalize on the stagger window is essential. The parry mechanic ties the defensive and offensive loops together: each clean parry simultaneously progresses the break bar and the Esper Cycle Meter, giving double value from a single well-timed input.
Team Composition for Boss Fights
Effective boss teams generally fill three roles: a break specialist who fills the stagger bar quickly, a burst damage dealer who capitalizes on the stagger window, and a support or survival character who keeps the team alive through longer encounters. The fourth team slot should address whatever the core three lack.
Role | Function | Example Esper |
|---|---|---|
Break Specialist | Rapidly fills the boss's break meter to trigger stagger more often. Multi-hit abilities and Chaos-attribute attacks are especially effective. | |
Burst DPS | Delivers extreme single-target damage during the stagger window. These characters save their heaviest skills and ultimates for the moment the boss becomes vulnerable. | Baicang (S-Class Incantation) |
Parry Specialist | Focuses on landing clean parries to fill both the break bar and the Esper Cycle Meter simultaneously, accelerating the team's rotation. | Any character with a responsive parry animation. Practice boss attack patterns to land parries consistently. |
Support/Survival | Provides healing, shielding, or buffs to sustain the team through prolonged encounters, especially during phases before the boss staggers. | Choose based on what the core team lacks. If the team is fragile, prioritize healing; if rotation is slow, prioritize energy or buff support. |
Encounter Types
Anomaly Boss fights appear across several game modes, each with its own structure and difficulty scaling. The table below summarizes where players will encounter these bosses and what to expect.
Game Mode | Description |
|---|---|
Standard boss encounters accessed through the Anomaly Commission system. Some commissions feature non-violent puzzles, while others are special boss fights that grant unique Arcs as a reward. | |
Tiered challenge instances featuring rotating high-tier bosses. Pilgrimage clears unlock the highest-tier ascension materials in the launch roster. | |
Anomaly Hunt | Weekly open-world world-boss encounters scattered across Hethereau and adjacent zones. Each hunt resets weekly and drops a unique purple-rarity ascension material. |
Advanced difficulty versions of boss encounters available through High-Risk Commissions. These feature tougher enemies, stricter time limits, and better rewards. | |
Repeatable boss encounters tied to The Circle. These help players farm progression materials and practice boss mechanics at various difficulty tiers. | |
Multi-stage dungeon instances. The final stage typically culminates in a boss fight with dungeon-specific mechanics. | |
Co-Op Dungeon Bosses | Boss encounters inside co-op dungeons like The Bank and The Hospital. These have scaled health pools and may introduce additional mechanics requiring team coordination. |
Boss fights in co-op dungeons feature scaled versions of Anomaly Bosses with higher health pools and additional mechanics that require team coordination. In The Bank (also known as Pink Paws Heist), all characters used are equalized with fixed stats regardless of player progression, meaning even unbuilt characters can contribute. The Hospital takes a different approach with a psychological horror atmosphere that adds tension to the boss encounter. Communication and role distribution become critical in co-op boss fights. Assigning one player as the break specialist, another as the primary burst dealer, and having at least one player focused on survival or support smooths out encounters significantly. Staggering the boss first and then having the whole team burn their burst abilities at once produces the highest damage output.
Rewards
Anomaly Boss encounters are among the most rewarding activities in the game. Standard Anomaly Commission bosses can drop unique Arcs that are not available through the gacha system. S-Class and most A-Class Arcs are obtained through gameplay modes rather than pulls, making boss farming a core part of character progression. Higher-difficulty encounters such as High-Risk Commissions and Circle Bounty offer better drop rates and additional progression materials, including enhancement resources and currencies used for upgrading equipment.
Developer Pacing Improvements
Based on feedback from the Co-Ex Test (February 2026), the development team at Hotta Studio made significant adjustments to boss fight pacing. Early beta encounters often ran around ten minutes, which testers found repetitive. The developers shortened typical boss fight durations to roughly three minutes by rebalancing health pools and stagger thresholds. This change preserved the strategic depth of the break and stagger loop while reducing the overall time commitment per encounter.
Lore and Backstories
Each Anomaly Boss carries a narrative tied to Hethereau's history. Their designs reflect the anomaly that warped them, and uncovering their stories adds context to the city's ongoing supernatural crisis. The Bureau of Anomaly Control maintains Anomaly Sighting Records that document known boss encounters, providing background on each creature's origin and behavior. For example, the Ora Puncher is described in its sighting record as lurking in shadowy backstreets, on gritty courts, amidst wild parties, or tucked away in a forgotten corner of Hethereau, waiting for challengers to step up. Other anomalies range from mischievous entities disrupting daily life to dangerous beings that threaten entire districts. Pay attention to commission briefings and environmental storytelling during boss arenas for lore clues.
Tips for New Players
Focus on learning boss attack patterns before attempting to parry. Dodging is the safer option while you are still learning timing windows.
Bring at least one break specialist to every boss fight. Triggering stagger consistently is more important than raw DPS in most encounters.
Save your ultimates and heavy skills for the stagger window. Damage dealt during stagger is significantly amplified.
In co-op, communicate with your team about who is handling the break role and who is saving burst for the stagger phase.
Use the Discord reaction (Nova plus Scorch overlap) whenever possible during boss fights; it directly chips away at the break meter.
Repeatable encounters like Circle Bounty are excellent for practicing boss mechanics at lower risk while still earning useful rewards.
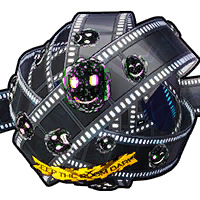
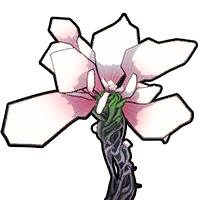
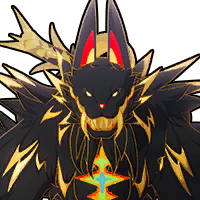
Known Boss Directory
The table below lists every boss currently tracked in the NTE bestiary with its category, location, elemental weakness, and a link to its dedicated wiki page. Story Bosses appear inside scripted story chapters. Anomaly Pilgrimage and Anomaly Hunt bosses repeat on a weekly cadence and are the primary farming targets for end-game gear materials.
Image | Boss | Category | Location | Weakness |
|---|---|---|---|---|
| Story Boss | Story encounter | ||
| Story Boss | Story encounter | ||
| Story Boss | Story encounter | ||
| Story Boss | Story encounter | ||
| Story Boss | Story encounter | ||
| Green Wall Slope | |||
| Talin Avenue | |||
| Anomaly Hunt | |||
| Anomaly Hunt | |||
| Anomaly Hunt | |||
| Anomaly Hunt | Nautili Tunnel | ||
| Anomaly Hunt | |||
| Anomaly Hunt | |||
Not yet documented |


Each boss page covers mechanics, per-level HP/ATK/DEF stat tables, resistance tables, drop lists, and a recommended team built around that boss's elemental weakness. For the combat systems behind these encounters (break and stagger, parry and Esper Cycle synergy, reward structure), the rest of this page is the canonical reference.