This article is a stub
It lacks sufficient information and needs to be expanded. You can help by adding more content.
Everything a Living carries is arranged across two related screens: the character menu back at The Chateau, and the heads-up display worn into an Expedition. The layouts below are drawn from the studio's own interface captures. Those captures carry a work-in-progress notice, so specific counts should be read as the state of the build they were taken from rather than as final rules.
The Character Screen
The character menu runs along a single tab bar. Earlier captures showed six tabs, and a later one showed eight, with Professions and Compendium added between them.
Tab | Purpose |
|---|---|
Inventory | What the character is carrying and wearing |
Abilities | The character's passive, tactical and ultimate abilities |
Mastery | The talent trees, covered on the Masteries page |
Experience | Level and progression toward the next level |
Professions | The chosen crafting or gathering profession |
Journal | Tracked quests and objectives |
Compendium | A reference collection, added alongside Professions in later builds |
Appearance | Applied cosmetics, presented around the character model under a Weapons and Equipment heading |
Tabs carry a small marker when they have something new waiting, so unspent Mastery Points or an unread journal entry are visible without opening each tab in turn. Each Living also carries a personal glyph shown beside their name on the Appearance tab.
A bookmarking system runs across the whole game rather than any single menu. Essentially any item can be bookmarked and highlighted, which players use for crafting recipes, cosmetic Schemas and anything else worth tracking. The studio considered building separate bookmarking for each category and deliberately chose a purpose-agnostic system instead, so it adapts to whatever a player happens to be working toward.
The Inventory Panel
Alongside the stash, the inventory panel divides what a character carries into four groups rather than one open grid.
Group | Slots Shown | What It Holds |
|---|---|---|
Toolbelt | Six | Quick-reach gear. The captured build shows slots themed to medicine, tools, food and drink, matching the dedicated Medicine slot described for healing items and the tool slot used by armour repair gear |
Equipment | Eight | Worn and carried kit: a bag, a garment, a weapon, a keyed pouch, headgear, chest armour, and two smaller ornament slots consistent with the Trinkets described elsewhere |
Items | Three | General-purpose item slots |
Stowed Weapons | Two | Weapons carried but not currently in hand |
An Unload All action moves the whole inventory into storage in one step, which is the usual first thing a player does on returning from a run.
The two Stowed Weapons slots are storage rather than an extension of the active loadout. Moving a weapon out of them and into the primary or secondary slot is an equip action with its own animation and its own duration, in the same way that putting on chest armour is, so changing what a Living is fighting with means making room to do it rather than cycling through a bag mid-exchange. See Weapons for the distinction between equipping a weapon and drawing one already held in an active slot.
Currency Readout
Three counters sit across the top of both the stash and the inventory, one for each tier of coin. They appear in descending order of value, matching the gold, silver and copper system described on the Vendors page, and coin carried out of a successful run lands in the stash automatically rather than occupying an item slot.
Storage Capacity
Storage is presented as a used-of-total figure with a control to expand it. Expansion is handled through an Expand Storage panel that spells out the rule directly: equipping additional bags is what grants more capacity. The panel splits the total between general storage and weapon storage, shows each equipped bag with its own capacity contribution, and displays further slots as locked until a reputation threshold is reached. See The Stash for how storage works in full.
The Expedition HUD
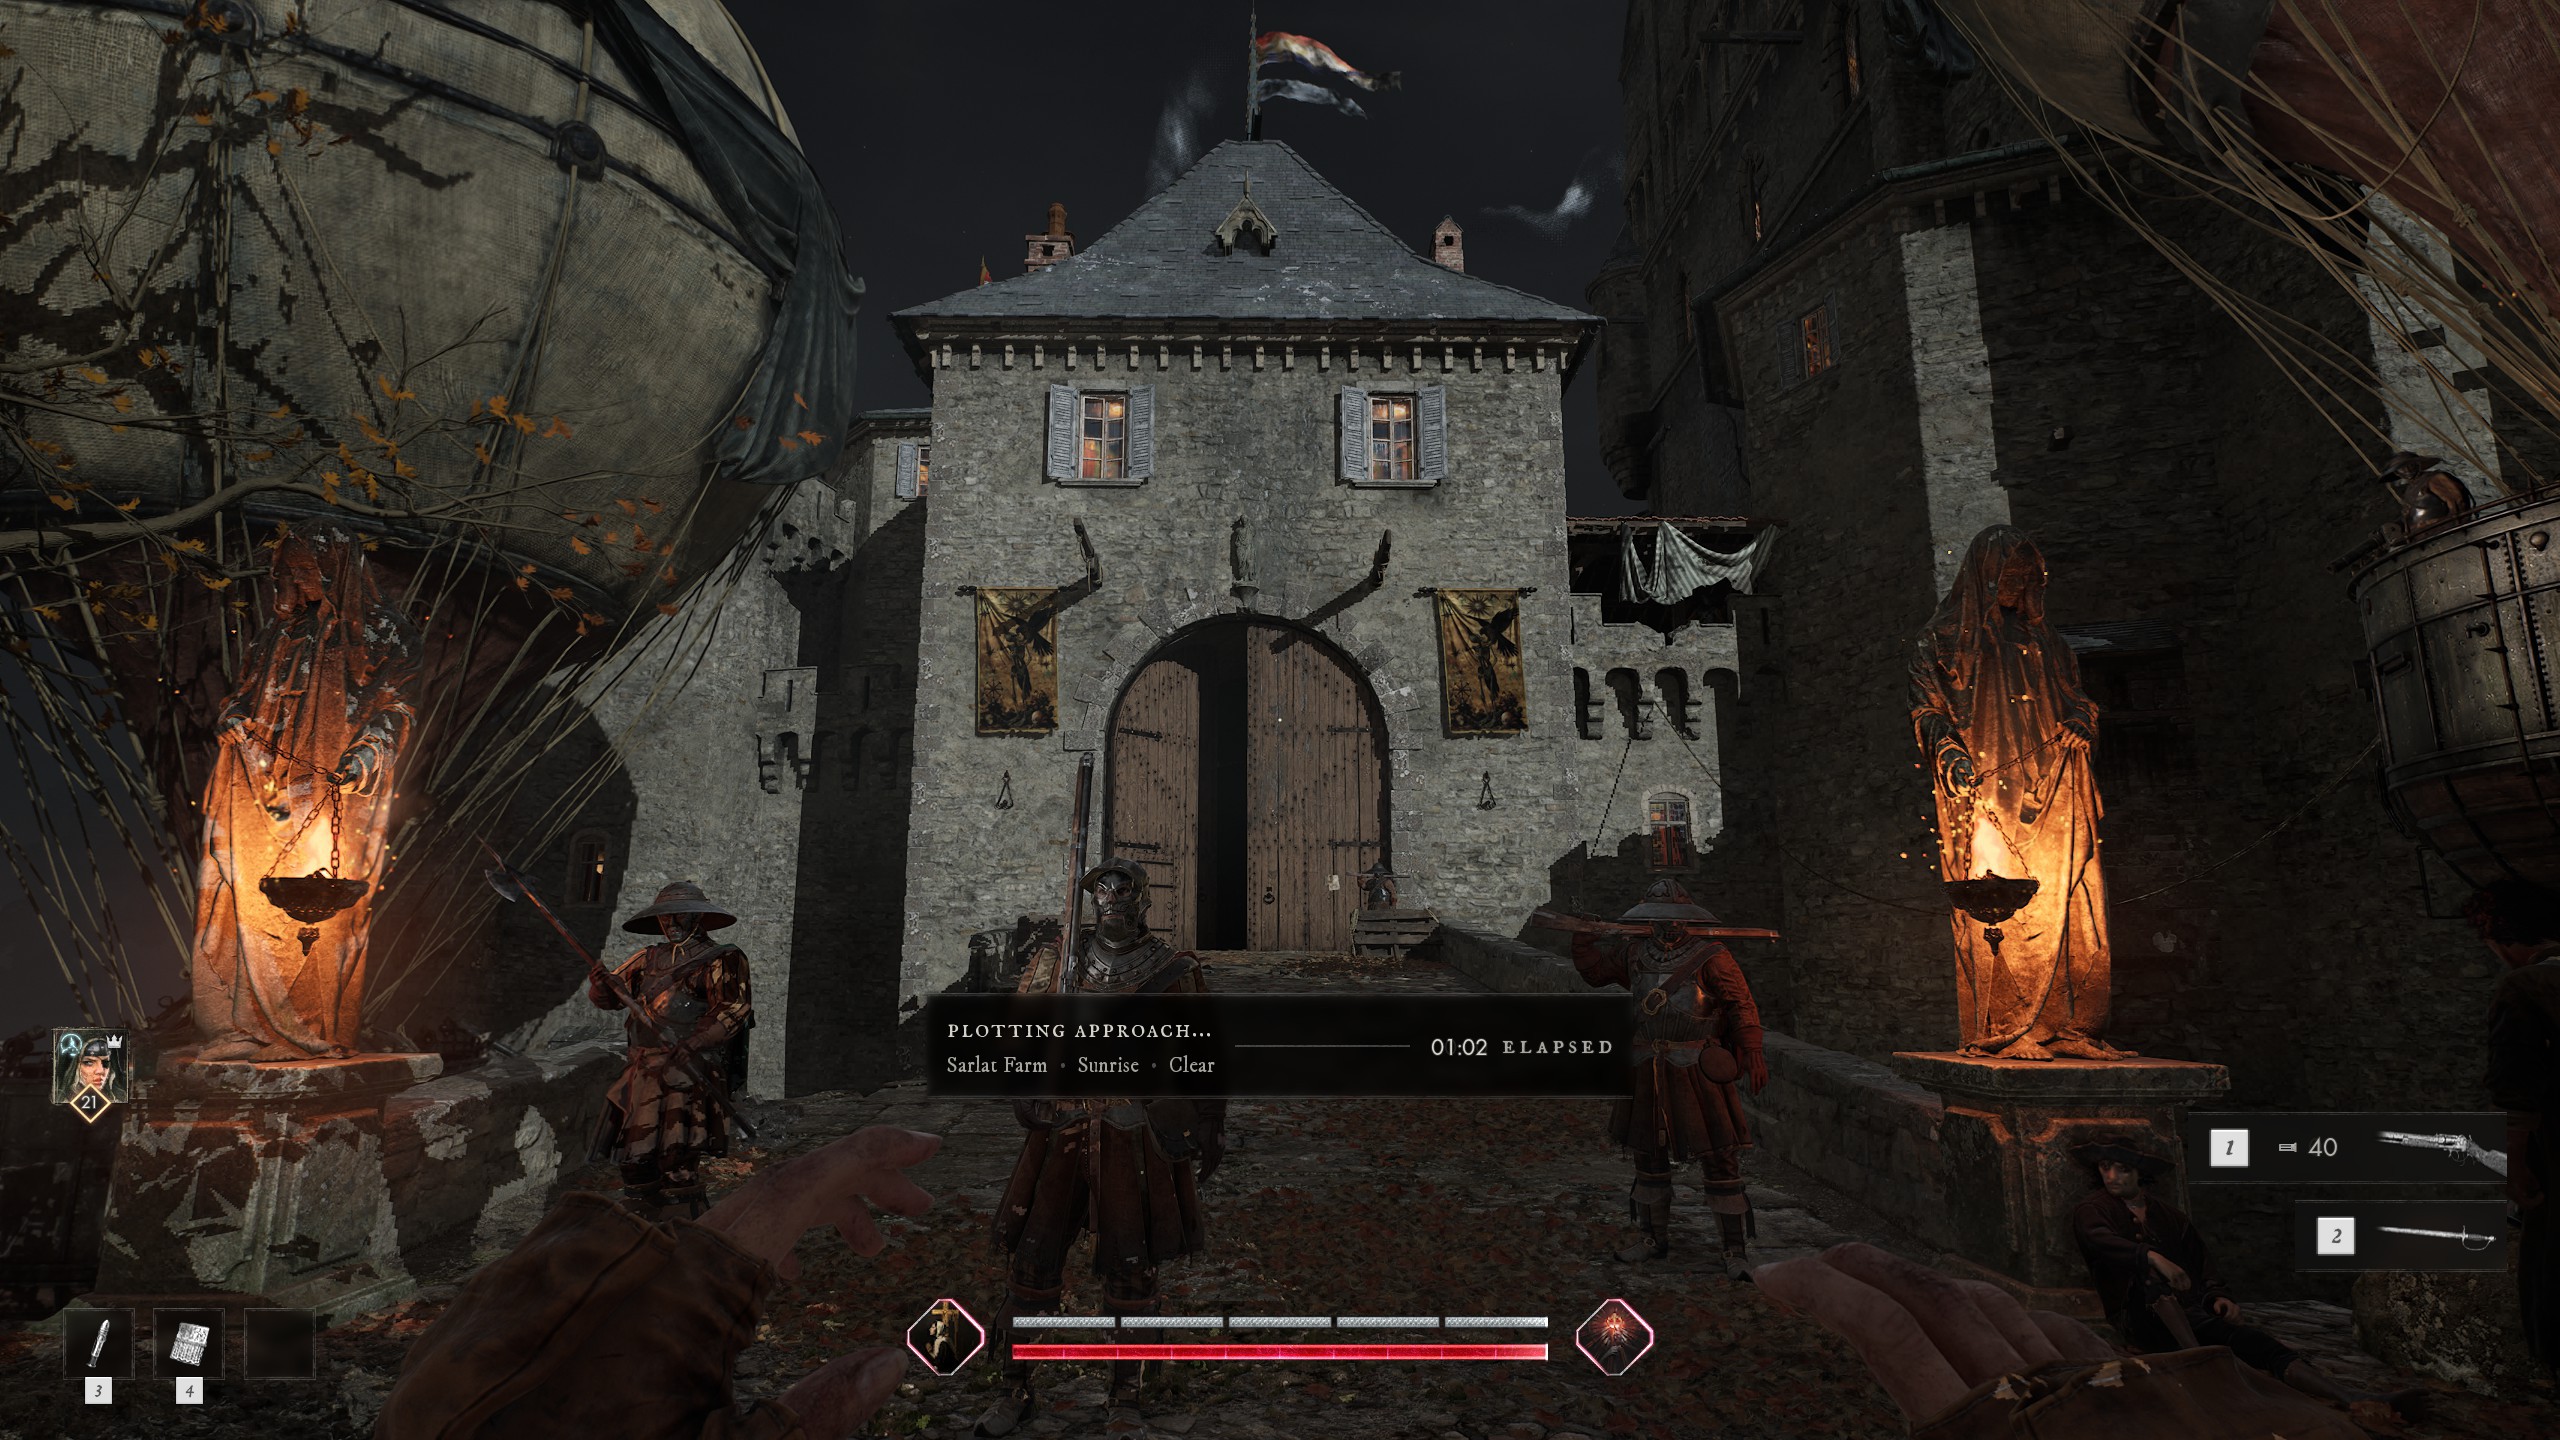
In the field the interface stays deliberately sparse. The elements visible in official capture are:
A character portrait in the upper corner showing the current level, with a crown marking the party leader.
Two stacked bars along the bottom centre, one for health and one for the stamina and energy resources that govern movement and close combat.
Numbered weapon slots along the right, showing the equipped firearm with its ammunition count and the equipped melee weapon.
Numbered quick slots along the bottom left for the toolbelt items a player expects to reach for mid-run.
Before a run departs, a banner reports the destination together with the conditions it will use, giving the location name, the time of day and the weather in a single line, and counts the time elapsed while matchmaking runs. See The Expedition Map for how a destination is chosen.