
Loading...
Loading...
High Priestess
April 21, 2026 at 09:40 AM
Added pustule burst mechanic and ranged-weapon requirement for the fight
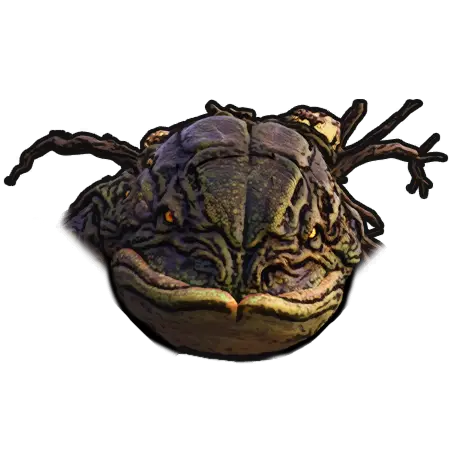
The High Priestess is the local-threat boss of the Cursed Swamps biome in Windrose. Her health bar labels her as "High Priestess" during the encounter. She is tuned for gear tier 11 to 15 and serves as the final Early Access biome boss. She appears as a towering pink-flower entity rooted in cursed swampland, tied directly to the game's plague and dark-powers storyline.
The in-game health bar labels this boss as "High Priestess." Earlier drafts of this wiki referred to her as "Tainted Priestess" based on mistaken community cross-references (the name "Tainted Priestess" is associated with a different game, Tainted Grail, not Windrose). The canonical Windrose name is High Priestess. Redirects from the old slug preserve external links.
The High Priestess is one of the most visually distinctive bosses in Windrose. She is depicted as a massive, flower-like supernatural entity, with blossoms and vines forming her body. Pre-launch promotional material depicted her towering over the cursed swampland. The design leans into the "mythical creatures" theme the developers set for the biome rather than a more conventional human or undead boss.
As the Cursed Swamps local-threat boss, the High Priestess represents the gear-tier 11 to 15 endgame of the Early Access launch content. Defeating her likely unlocks the final crafting tier for the Cursed Swamps and opens the path to Blackbeard's three-map treasure chain, though specific story gating has not been publicly confirmed. She is one of the key encounters tied to the game's supernatural corruption narrative.
Recommendation | Details |
|---|---|
Gear tier | 11 to 15 (high Rare to Epic) |
Recommended level | Near level cap; fully spec'd into one or two talent branches |
Weapon damage type | Crude weapons (clubs, halberds, maces) are generally effective vs undead/supernatural; bring pierce backup for armored thralls |
Armor minimum | Maximum-upgraded Epic set recommended; 4-piece bonuses from Flibustier's Attire or Juggernaut sets align well |
Elixir of Pain Relief (damage resistance) is a common recommendation; keep multiple Healing Potions (Great) ready | |
Food buffs | Stack +20 damage type food plus a max-duration HP/stamina recipe |
Support | Consider co-op; group play allows one player to draw aggression while others deal damage |
As the final local-threat boss of Early Access launch content, the High Priestess is expected to be a multi-phase encounter with add spawns (plague thralls) and area-of-effect attacks tied to her floral/plague theme. Specific attack patterns continue to be documented by the community. General Soulslite strategy applies with emphasis on:
Managing space around her root position; she is rooted rather than mobile
Clearing summoned plague thralls before they accumulate
Dodging area-of-effect plague clouds (unblockable; take damage-over-time)
Using Crude-damage weapons like halberds or maces for consistent DPS against supernatural flesh
Stamina discipline; long fights punish any winded state
Defeating the High Priestess is expected to grant endgame loot appropriate to her gear tier, which may include unique weapons tied to the plague theme (weapons like the Plague Halberd carry corruption stacks that suggest a larger thematic family). Specific drop data continues to be collected by the community during Early Access.
The High Priestess connects to the game's "mysterious dark powers" narrative thread. She is likely tied to the Caribbean's spiritual world and the plague corruption spreading through the islands. Her domain in the Cursed Swamps maps thematically to the supernatural underside of the Age of Piracy setting, distinct from the more grounded pirate politics of Blackbeard's undead fleet. Whether she is a willing servant of the dark powers, a victim transformed by them, or an independent entity is part of the story the player uncovers during her questline.
Cursed Swamps - home biome
Procedural Biomes - biome progression and local-threat bosses
Supernatural Forces - dark powers lore
Enemies - full enemy roster
Weapons - crude-damage weapons effective against her
The High Priestess's health bar will not drop to zero through melee pressure alone. Her body is covered in pale swollen pustules that act as her posture/shield layer: while they are intact, she keeps swinging through heavy-attack punishes and regenerates her stagger threshold on any short pause in pressure. Bursting the pustules is the load-bearing mechanic that converts the encounter from an unwinnable stamina trade into a fight with a scheduled damage window. Each pustule that pops chips the overall shield row, and once enough are gone she collapses into a brief full stun that opens a heavy-attack damage window several seconds long.
The pustules do not burst from melee hits. They have to be shot off with a ranged weapon, which is why every working build for this fight carries a firearm in the secondary slot even when the main-hand weapon is a two-handed melee piece. A sword or halberd swing that connects with a pustule passes through it without popping it, and the shield row simply does not fall. This is the single most important thing to prepare for before entering the arena: carrying no firearm means the damage ceiling will never be reached no matter how clean the dodges are.
As the fight progresses, the pustules regenerate on alternating sides of her body. A sequence of left-side pustules bursts will be followed by a batch that regrows on her right side, then left again, and so on. The practical counter is to read which side currently carries the shield batch before committing to a repositioning pass, and to keep the ranged weapon crosshair floating toward that side between melee counters. Rotating the camera to chase the visible cluster is faster than dodging to the far side of her body and hoping a pustule presents itself.
Her back is an especially clean target during her forward-charge animation. When she telegraphs a long forward lunge that covers most of the arena, the path sends her past the player's side and leaves her back fully exposed for several seconds. That window is the single most reliable pistol or musket opening in the fight because multiple pustules present at once and her flailing attacks cannot reach the rear arc. Saving ranged ammunition for that charge is usually the fastest way to drop one of her shield bars.
Any firearm will pop pustules, but the practical ranking between them depends on shot cadence because the pustules present in short bursts rather than as stationary targets. Reliable Musket is the textbook fit for the fight: musket reloads are the fastest in the class, and the single-shot chambering recovers between pustule presentations rather than stalling between them. Reliable Pistol covers the same role from the off-hand slot and brings three shots before reloading, which is enough to empty an entire shield row in one punish window during a vulnerability phase. Plague Pistol is the sustain option because its 40 percent damage-as-health refund doubles as an emergency heal on top of each pustule hit, which makes it especially strong for captains running the fight close to their potion ceiling. Drake's Double-Barreled Pistol is a third viable pick; the two-shot burst also clears a pustule pair before reload but trades the sustain of the Plague Pistol for raw Pierce damage on the exposed boss during the stun.
Once enough pustules have popped, she keels forward and enters a full vulnerability phase. This is where the fight's damage is actually done. Commit heavy attacks rather than light swings because the stun lasts long enough for two or three fully-charged heavies to land, and heavies apply noticeably more health damage per connect than lights during a guaranteed-crit moment. Crit-focused builds with an Elixir of Concentration active turn this window into roughly 130 percent extra damage per heavy swing (60 percent base crit multiplier plus 30 percent from a Major Cutthroat Ring plus 30 percent from the elixir plus 10 percent from the Privateer set four-piece stacking), which is the reason crit dual-halberd and crit-spear loadouts clear this fight with ammunition budgets the other builds cannot match.
Dodging during the stun is wasted time. She does not retaliate during the vulnerability phase and the camera can sit close enough to unlock-target her body for maximum swing accuracy. The practical input rhythm is lock-on, unlock for the heavy swing, re-lock immediately after the connect to check for the next committed attack, repeat. Staying close through the stun is safer than backing off, because the recovery animation is the signal that the next shield row is already regrowing and the pustule-burst loop needs to restart.
Between pustule phases she runs a compact attack pattern: a heavy stomp, a roll-over that covers a large area and demands a double dodge, a long forward charge with the exposed-back window described above, and a vomit/puke animation that announces each vulnerability phase. The vomit animation is the signal to close distance for the heavy-attack punish rather than back off. A tongue or tail slam appears between combos and has a wider reach than the telegraph implies; treating the animation like a long-range swipe and dodging laterally is safer than trying to back-walk out of it. None of her attacks are blockable at full-chip recovery, which is why this fight rewards the dodge-attack rhythm rather than the parry rhythm other launch-build bosses train on.