Loading...
Loading...
Machina Knight with Marni Spear
April 25, 2026 at 03:05 PM
Rewired 1 wikilink to longer matching article titles
The Machina Knight with Marni Spear is the second and final phase of the Machina Knight elite boss encounter in Crimson Desert. After the Machina Knight with Marni Longsword is defeated, the construct reconfigures itself with a two-handed spear and resumes the fight with a completely different moveset. This phase is significantly harder than the first. The knight becomes faster, more mobile, and gains access to invulnerable states and ranged projectile attacks that punish the parry-heavy strategies that worked in phase one.
Located at Marni's Outpost in the Delesyia region, the spear phase is the final obstacle between players and the Electro-Mecha Longsword, a unique weapon with Lightning Affinity. The transition from longsword to spear is immediate, with no healing break between phases. Players who spent too many resources in the first phase often find themselves struggling to survive the spear knight's relentless aggression.
The core challenge of this phase is adapting from a parry-focused mindset to a dodge-focused one. The spear knight's attacks are faster, have less predictable timing, and many occur during invulnerable windows where the knight cannot be staggered or interrupted. Evasion and patience replace aggression and parrying as the primary survival tools.
Attribute | Details |
|---|---|
Name | Machina Knight with Marni Spear |
Type | Elite Boss |
Weapon | Two-Hand Spear (Electro-Mecha Spear) |
Location | |
Region | |
Quest | Blade of Discipline (Delesyia Faction Quest) |
Phase | Phase 2 of 2 (follows Machina Knight with Marni Longsword) |
Difficulty | Hard (significant step up from Phase 1) |
Stat | Value |
|---|---|
HP | 1,896 |
Attack | 218 |
100 | |
100 | |
Fatal | 5 |
In its spear configuration, the Machina Knight swaps its longsword for the Electro-Mecha Spear while retaining the same mechanical armor set. The construct's ability to switch weapon systems mid-fight reflects the modular engineering philosophy behind Marni's designs.
Slot | Item | Type |
|---|---|---|
Weapon | Two-Hand Spear | |
Head | Machina Helm | Helm |
Body | Machina Plate Armor | Upperbody |
Cloak | Machina Plate Cloak | Cloak |
Hand | Hand | |
Foot | Machina Plate Boots | Foot |
Like the longsword configuration, the Machina Knight with Marni Spear retains the "Boss Large Human" passive skill. This classifies it as a large humanoid-type boss and governs its stagger behavior and interactions with player abilities.
Skill | Type | Description |
|---|---|---|
Boss Large Human | Passive | Classifies the boss as a large humanoid enemy, affecting stagger interactions and certain ability bonuses |
Skill Bastier Buff | Passive | Grants the Machina Knight enhanced combat capabilities during certain attack sequences, increasing its offensive output and resistance to interruption. |
The spear phase introduces a fundamentally different rhythm compared to the longsword. Attacks come faster, with shorter wind-ups and tighter dodge windows. The knight also gains access to invulnerable states and ranged attacks that were absent in the first phase. Parrying is far less reliable here because many of the knight's attacks occur during super armor windows where stagger is impossible.
Attack | Description | How to Counter |
|---|---|---|
The knight enters super armor (invulnerable) mode and performs multiple consecutive stab attacks in rapid succession. Each thrust is individually dangerous, and the entire sequence can kill players who fail to evade. | Do not attempt to parry or block. Dodge continuously in one direction until the stab sequence ends. The knight commits to a fixed number of thrusts before pausing, so count the stabs to anticipate the recovery window. | |
Seeking Cubes | The knight generates floating cubes that home in on the player's position. These projectiles track aggressively and deal moderate damage on contact. The knight is invulnerable while firing the cubes. | Dodge laterally when the cubes close in. Do not try to run away in a straight line, as the cubes will curve to follow. Time your dodge to the moment just before impact for clean evasion. Stay mobile until all cubes have detonated. |
Spear Lunge | A quick forward thrust that covers substantial ground. The knight closes distance rapidly, making it dangerous for players who try to maintain range. | Dodge sideways when you see the lunge begin. Do not dodge backward, as the lunge has enough range to catch retreating players. |
Sweeping Spear Arc | The knight sweeps the spear in a wide horizontal arc at mid-range. This attack comes out quickly and has deceptive reach due to the spear's length. | Dodge through the attack toward the knight rather than away from it. Getting behind the knight after the sweep creates a brief punish window. |
Aerial Slam | The knight leaps into the air and slams the spear down into the ground, creating a small area-of-effect shockwave on impact. The jump telegraph is the clearest dodge cue in this phase. | Roll away when the knight reaches the peak of its jump. The impact zone is small, so a single well-timed dodge in any direction avoids the damage. |
The most important adjustment when transitioning from the longsword phase to the spear phase is to stop relying on parries. Many of the spear knight's attacks occur during invulnerable windows where parry stagger has no effect. Attempting to parry during these windows leaves you standing still and absorbing full damage. Switch entirely to a dodge-based defensive approach and only attempt parries on the rare non-invulnerable attacks if you are confident in the timing.
The spear knight enters super armor mode periodically, signaled by a visual shimmer effect on its body. During these phases, the knight cannot be staggered, interrupted, or knocked down by any player ability. Your only option is to evade until the invulnerable state expires. The rapid stab combo and seeking cubes both occur exclusively during these windows. Focus all your attention on dodging and do not waste stamina on offensive actions that will have no effect.
The spear knight has brief recovery windows after completing its invulnerable attack sequences. The end of the rapid stab combo leaves the knight stationary for a short moment, and the landing after the aerial slam creates a similar opening. These are your primary damage windows. Land one or two hits during each recovery, then immediately prepare to dodge the next attack. Do not overcommit. The knight recovers faster than most players expect, and being caught mid-swing during a counter will cost significant health.
The seeking cubes are the most mechanically distinct attack in the encounter. When you see the cubes materialize, stop attacking and focus entirely on evasion. The cubes track your position and will curve to follow lateral movement. The correct timing is to dodge at the last possible moment before each cube makes contact, forcing them to overshoot. Dodging too early allows the cubes to adjust their trajectory. Stay mobile, keep your camera angled to see the cubes, and dodge through them rather than away.
Because this phase follows immediately after the Machina Knight with Marni Longsword without a healing break, consumable management across both phases is critical. Ideally, arrive at the spear phase with most of your healing items intact. If you have Sleep Arrows in your inventory, they can be useful during the non-invulnerable windows to create free damage opportunities, though the arrow must land during a vulnerable state to take effect.
The spear phase cannot be fought in isolation. It is triggered automatically upon defeating the Machina Knight with Marni Longsword at Marni's Outpost in Delesyia. The outpost is located in the northern part of the region, just north of Gorthak on the world map. Glide into the outpost compound from the surrounding elevated terrain to initiate the encounter. See the Machina Knight with Marni Longsword article for detailed directions.
The Machina Knight's ability to swap weapon configurations mid-fight demonstrates the modular design philosophy behind Marni's constructs. Unlike organic enemies that fight with fixed capabilities, Marni's mechanical creations can reconfigure themselves to adapt to combat situations. This same engineering principle is visible in other Marni-related encounters throughout Delesyia, from the drilling mechanisms of Marni's Excavatron to the automated patrols that guard the region's various installations.
The Mechanicus and the Golden Star represent the far end of Marni's engineering ambitions, being constructs of enormous scale and complexity. The Machina Knight occupies a middle tier: sophisticated enough to employ multiple weapon systems and invulnerable states, but still fundamentally a guard unit designed to protect a single location. Its combat design reflects this role, combining relentless aggression with mechanical precision.
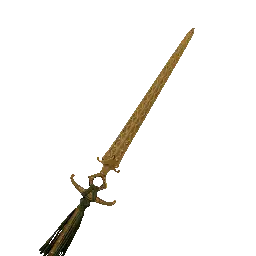
Defeating the Machina Knight with Marni Spear completes the encounter and awards the Electro-Mecha Longsword. This unique two-handed weapon carries Lightning Affinity, causing every strike to apply an electrical effect that can stun and electrocute enemies. The weapon has 27 Attack Damage and provides a distinctive visual lightning effect during combat.
Reward | Type | Details |
|---|---|---|
Two-Handed Weapon | 27 Attack Damage, Lightning Affinity (stun and electrocute on hit). Cannot be upgraded or fitted with Abyss Gears. |
While the Electro-Mecha Longsword's base attack damage is moderate, the Lightning Affinity effect adds significant utility in fights against groups of enemies and bosses vulnerable to electrical stuns. The inability to upgrade the weapon or slot Abyss Gears means it will eventually be outpaced by upgraded alternatives, but it remains effective through the mid-game and is one of the more visually striking weapons available.
Because this is the harder of the two phases, gear requirements are strict. Tier 5 or higher armor with Abyss Cores focused on Damage Reduction is strongly recommended. Without adequate defense, the rapid stab combo can kill in two or three hits, and the seeking cubes will chunk your health severely if a single dodge is mistimed. Prioritize survivability over offensive stats.
Bring enough healing items to sustain yourself across both phases. The spear phase is where most of your consumables will be spent. Healing items that restore Health over time are particularly useful because you can activate them during dodge sequences without needing to stand still. Keep at least 10 to 15 meals reserved specifically for this phase.
Stamina is your most critical resource in the spear phase. Every dodge costs stamina, and the invulnerable attack sequences require multiple consecutive dodges without pause. If your stamina pool is too small, you will run out mid-sequence and take a hit. Invest in Stamina before attempting this fight. Make sure you can perform at least four to five consecutive dodges without fully depleting your bar.
Stop parrying when the spear phase begins. The invulnerable windows make parrying unreliable and dangerous.
Watch for the visual shimmer effect that signals super armor activation. When you see it, immediately switch to pure evasion.
Dodge through seeking cubes at the last moment. Early dodges allow the cubes to adjust their tracking.
The rapid stab combo has a fixed number of thrusts. Count them so you know when the recovery window is coming.
Only attack during recovery windows after invulnerable sequences end. One or two hits at a time is the safe limit.
The aerial slam is the most telegraphed attack in this phase. Use it as a reliable punish opportunity every time it appears.
Conserve resources during the Machina Knight with Marni Longsword phase so you enter this fight with plenty of healing items.
Sleep Arrows can work during the knight's vulnerable windows but have no effect during super armor states.