

Route planning is the strategic-map layer of DREADNOUGHT TARTARUS. Between active engagements, the world map becomes a planning surface on which the player decides where the TARTARUS advances next, which objectives along that path to engage, and what modular customization the ship should carry into them. For the broader pitch, see the overview.
Where it Sits in the Loop
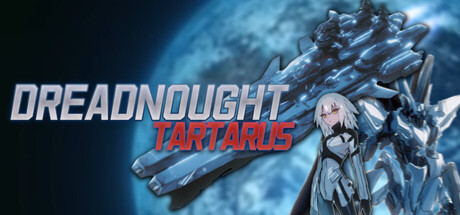
DREADNOUGHT TARTARUS does not use mission select. The whole game runs as a continuous campaign across a strategic map, and the dreadnought is always on that map. The planning surface is the in-between space: when the player exits an engagement, the camera lifts to the strategic layer, and the next decision is which direction the TARTARUS advances and how it should be configured before contact resumes.
Three Planning Decisions
Three decisions sit on the planning surface, each feeding into the next.
Decision | What the Player Chooses |
|---|---|
Heading | Which warzone the dreadnought advances into next and the broad direction of travel across the strategic theatre. |
Objectives | Which objectives along the chosen route the dreadnought engages and in what order. |
Loadout | How the seven named equipment categories are configured for the next stretch, including which firing modes each weapon hardpoint is set to. |
Wargame Plus Tower Defense
The planning surface is where the dual-genre framing of the game comes through. The wargame side shows up in the route choices and the loadout configuration: there are decisions to make about which fight to pick and how to outfit for it. The tower-defense side shows up in the way the dreadnought continues advancing into pressure once the route is committed, with the player managing fields of fire and weapon priorities while the ship pushes forward.
Variety Shapes the Catalogue
Because the catalogue of equipment available through reverse engineering depends on which enemy categories the player has engaged, the route chosen on the planning surface has long-tail consequences. Avoiding extraterrestrial invasion units early means fewer extraterrestrial-derived modules later, even if the early route was the safer one. Route choices and loadout evolution are intentionally coupled.
Mech Drop is Still Within Route
Dropping into the combat mech does not exit the strategic structure. The dreadnought stays on the same route while the player handles a ground-level engagement, and the mech returns to the hangar bay when finished. The planning surface remains intact across both scales.
Unconfirmed Details
Several specifics about the planning surface have not been publicly described. Treat them as open questions:
Whether the strategic map shows the entire theatre at once or unlocks zones progressively.
Whether routes branch and re-merge, loop back, or run as a single forward path.
Whether the player can change the route mid-advance or only at engagement breakpoints.
Whether intel gathered on the planning surface (scouting, reconnaissance) is a separate currency from combat intel.
Whether time-based events on the strategic map pressure route choices.
Whether named factions occupy specific zones on the strategic map.
Named War Zones
Three of the six published screenshots label the region the battleship is fighting in with a card in the lower-left corner, giving the first concrete look at how the strategic map is divided. Two zone names have appeared in official material so far.
Zone | What Is Shown |
|---|---|
Earth Orbit | A space engagement above the planet, shown in two separate screenshots. The dreadnought fights alongside and against other capital ships, with beam fire crossing the frame in red, green, white and yellow, and smaller craft scattered in support. This matches the opening premise, in which the vessel arrives in orbit. |
Kaiju Wastes | A barren, dust-hazed surface region fought over against flying creatures rather than ships or armour. It lines up with the gigantic monsters and anomalous lifeforms category on the enemies page. |
Three further shots show the battleship over dense cityscapes, intact in one and bombarded in the others, which matches the urban defence category. None of those frames carries a visible zone name. How many zones the campaign holds, whether these names are fixed locations or region types, and how they connect on the map have not been published.
In-Mission Readouts
Four of the published screenshots show a consistent set of readouts around the edge of the screen. The remaining two carry no interface at all and appear to be camera shots rather than captures of play.
Readout | Position | What It Appears to Track |
|---|---|---|
Health | Upper left | A percentage with a horizontal bar. It reads 70 percent in the city shot and 50 percent in both orbital shots, so it changes between engagements rather than being fixed. |
Completion | Upper right | A percentage with a tall vertical gauge that fills from the bottom. It reads 20 percent in every shot that displays it, which more likely reflects how the captures were staged than a real cap. |
Contact display | Upper right, above completion | A shallow elliptical ring with a heading arrow at its centre and orange dots spaced around it, presumably nearby hostiles. |
Zone card | Lower left | A small image of the region with its name printed across it. Present in three shots, absent from a fourth that otherwise shows the full interface. |
These are read from published screenshots rather than from a described interface, so treat the labels as the on-screen text and the readings as provisional. No key bindings, menu layout, or refit-screen imagery has been published.