
Loading...
Loading...
Boss Strategies
February 2, 2026 at 01:01 AM
Added images to article

Crimson Desert features dozens of bosses, each playing a crucial role in shaping intensity, variety, and progression. Boss battles reward players with weapons and moves from defeated enemies. The boss battles shown in demos demonstrated tremendous variety in individual mechanics, from conventional sword fights to Shadow of the Colossus-style climbing encounters.
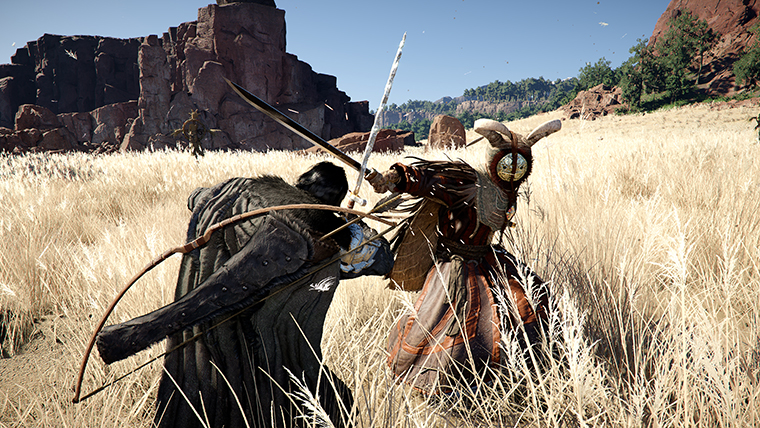
Combat is faster-paced than Souls-likes, enemies attack quickly, rewarding aggressive play over pure defense. Pressing R3 (Force Palm/stun) near bosses can stagger them for heavy hit chains.
Each enemy type has distinct strengths and weaknesses, forcing players to adapt tactics continuously. Boss fights demand skill, timing, and strategic positioning rather than mere button-mashing. Players must observe patterns, exploit vulnerabilities, and utilize the terrain.
Blue health bars indicate two-phase fights. Red health bars mean one phase, once depleted, the fight is over.
Official description: 'In the ruins of a forgotten kingdom, a fallen king sits upon a forsaken throne. He waits in solitude, his blade poised to protect his ashen stronghold, ready to deliver judgment to any invader foolish enough to claim what's his.'
The Staglord is a sword-and-board boss dressed in Celtic armor with gorgeously ornate weaponry that you can collect upon defeating him. He has three health bars and is the most conventional of the demo bosses, a big, powerful warlord who leaps and charges to close the gap before dishing out hefty sword attacks.
Strategy: Focus on parrying rather than blocking to avoid chip damage. Use post-parry heavy attack combos when he staggers. Avoid grappling moves, they're completely ineffective due to his size. Keep the bow for opportunistic shots between melee exchanges. Watch your stamina meter carefully. His attack patterns are predictable once mastered, settle into your own rotation.
Even when you block, chip damage from blocks adds up. His unblockable attacks put you at a disadvantage if you take the hit.
Official description: 'They say he was once a slum-dweller. They say his fate was to die there, as an outcast. But when he donned his mask, he rewrote his destiny. Now he terrorizes the citizens of Hernand as the bogeyman they call "The Devil of the Reed Fields."'
The Reed Devil is a short-statured ninja-esque swordsman residing in the reeds of Frozen Soul Mountain who strikes quickly before retreating into the surrounding wheat field. He uses Iaijutsu (quick-draw sword techniques) for fast slashes and summons clones and distractions.
Strategy: Close the gap aggressively, just hit him. Keep close so when he disappears and reappears, he's easier to locate. He deals death by a thousand cuts rather than massive single blows. He summons wicker totems that must be destroyed; use your bow to dispatch them while dodging his attacks. This is a boss you must burn through lest he chip away your health.
Embrace aggression over defense. Use slow-mo Precision Focus for Dead Eye-style targeting to hit multiple targets.
Official description: 'A gem-crusted boulder sits stoic and silent, a dazzling prism of riches. Its shimmering splendor lures those intoxicated by greed to a seemingly innocuous hillock. Once they draw near, the Queen Stoneback Crab emerges to swiftly send all trespassers to an early grave.'
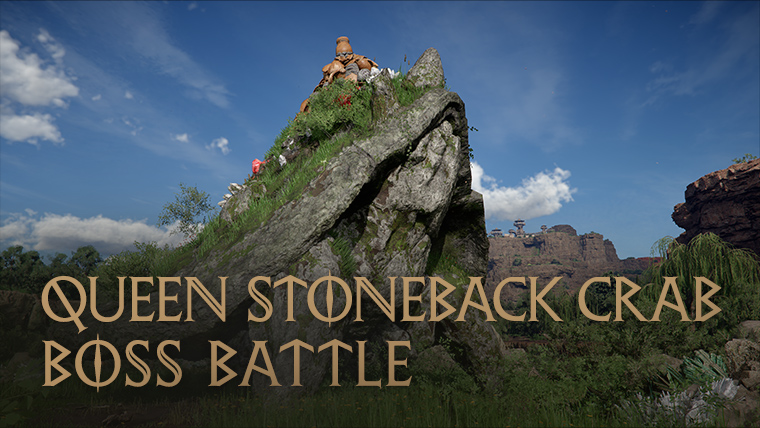
The Queen Stoneback Crab appears as an unassuming boulder with various valuable gems. When Kliff's ally Diederik attempts to mine it, the creature comes to life. This Shadow of the Colossus-style fight requires climbing the creature.
Strategy: You cannot strike her directly. Mount and clamber up her back as she bucks and rears to fling you off. Break formations guarding weak spots, deal damage to exposed weak spots, then perform a specific combo to break the chimney on her head. Use the grappling hook (white ghostly strand) to swing through the air and maintain position.
Methodically choose attack locations. Destroy her gems while mounted to expose vitals.
Official title: 'Follower of Darkness.' Hexe Marie is a witch who transforms into a murder of crows and summons pot-headed automatons (scarecrow-like minions with tilted jugs on their heads) to swarm you. Her gimmick: spawning skeleton hordes and dropping magic mines that explode for damage over time.
The fight is divided into two phases. Marie warps around the combat zone while keeping you busy with her flunkies. She's not tough health-wise, but attacking her is easier said than done, she's a slippery mix of crows and shadows.
Strategy: Bring explosive arrows, they're essential for blasting her minions into chunks of crockery. Ice arrows help immobilize swarms of Hexe Earthen Warriors. Use 'Turning Slash' to make short work of multiple enemies. Loop in Force Palms to launch into the air, activate bullet-time, and unload flaming explosive arrows into the swirling mass of feathers.
When she transforms to crows, she repositions, track where she reforms to maintain pressure. Keep moving and watch for pursuing minions.
Cassius Morten is a betrayer of the realm, a former subordinate of Marquis Stefan Lanford who allied with the Drunken Black Bears to instigate rebellion in Calphade. This hulking knight is set atop a crumbling keep and wields a flail and shield that emits shockwaves.
The fight involves environmental hazards: swinging pendulums, arrow volleys from parapets, and timed sequences to dismantle siege towers.
Strategy: Look for opportunities to collapse pillars on him for massive damage, triggering finishing moves this way is satisfying and effective. Use the environment to your advantage while managing the additional hazards.
An optional dragon encounter on a snow-caked plateau. Ice pillars pop up randomly during the fight, the key is shattering those pillars to expose the boss's belly.
Strategy: Destroy ice pillars when they appear to create vulnerability windows. When the belly is exposed, climb onto the dragon's side to deal damage. The physics-driven animation when smashing through ice is gorgeous, enjoy the spectacle while executing the strategy.
Prepare for a visually spectacular fight requiring both ground combat and climbing mechanics.
A colossal mechanical (clockwork) dragon in an abandoned keep. The fight evolves across several phases: dodge fire tornadoes and missile barrages in phase one, then chase it aerially while your own dragon companion assists.
Strategy: EMP bullets deal significant damage to the mechanical construct, they're essential for this fight. Position carefully to avoid fire tornado placement patterns.
In a dramatic mid-fight moment, Kliff leaps onto Golden Star's back, leading to a breathtaking mid-air chase with another dragon joining the pursuit.
A major boss showcased in seven minutes of Gamescom gameplay demos. White Horn is a massive creature requiring careful approach.
Strategy: Dodging is your biggest strength. Use explosive arrows for significant damage. Study the available gameplay footage to learn attack patterns before attempting.
The branchmaster of the Goldleafs, an unusual pale goblin (not green). His guards use red mist tactics. Split Horn executes rapid attacks and uses ranged attacks if you create too much distance. He only has a red health bar.
Strategy: You don't need to fully deplete his health. After taking off a significant portion, a cutscene triggers where Kliff deals a crippling blow and leaves him to be finished by his own people. A QTE kicks off the fight, so be ready.
An early soldier commander boss. His health bar is blue (indicating two phases). Matthias favors heavy charge attacks and attempts running kicks if you create distance.
Strategy: Dodge his charge attacks to open him up for combos. This fight serves as a good learning experience for the game's defensive mechanisms.
Fontaine wields a cursed shield that houses a spectral knight capable of executing its own independent attacks. This dual-threat mechanic forces you to track multiple attack patterns simultaneously. The fight occurs during a castle siege with soldiers continuously firing projectiles.
Strategy: Learn to anticipate both Fontaine's physical attacks and the spectral knight's independent strikes, they operate on different timings. Keep moving to avoid soldier projectiles while finding windows between the dual attacks. Upon victory, you acquire the cursed shield for your own use, adding a powerful summoning tool to your arsenal.
