
Loading...
Loading...
Nanally
April 28, 2026 at 12:22 AM
Added skill descriptions, recommended Arcs, ascension materials, and stat curve
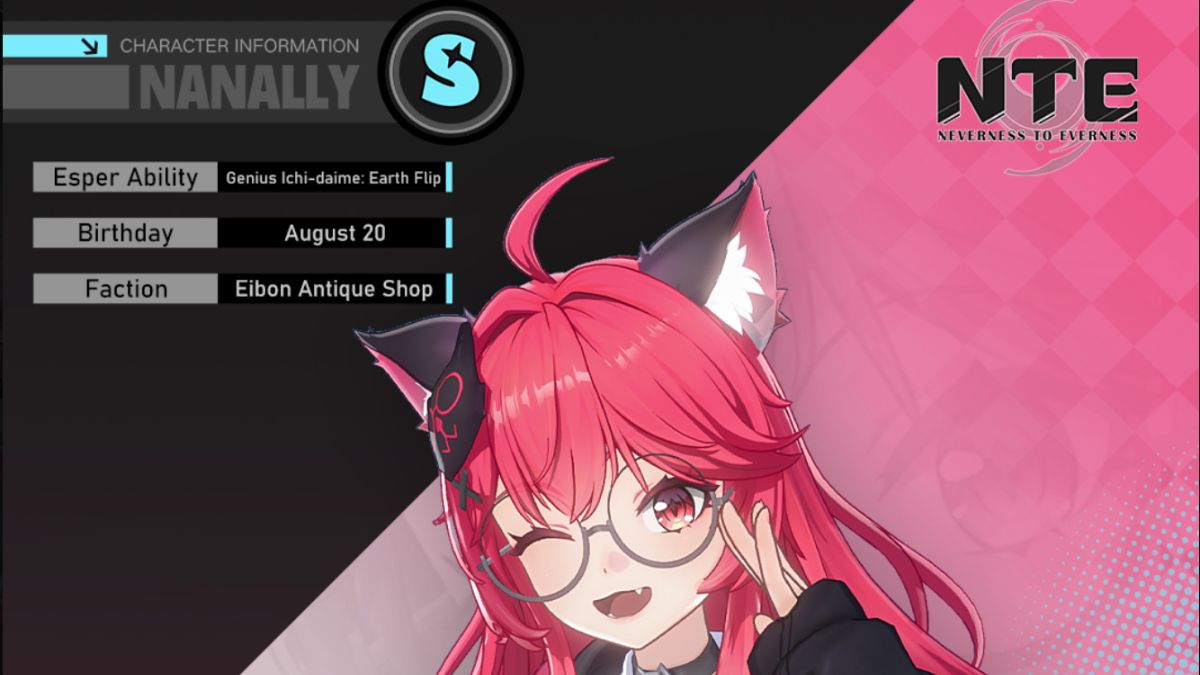
Nanally is an S-Class Anima character, the head of the Coluccis Family, and a core member of the crew at the Eibon Antique Shop. She is widely considered the best main DPS character in Neverness to Everness at launch, combining unmatched damage output with a forgiving playstyle that rewards both beginners and veterans. Her cat-girl appearance, complete with feline ears and a playful attitude, matches her agile, claw-based fighting style.
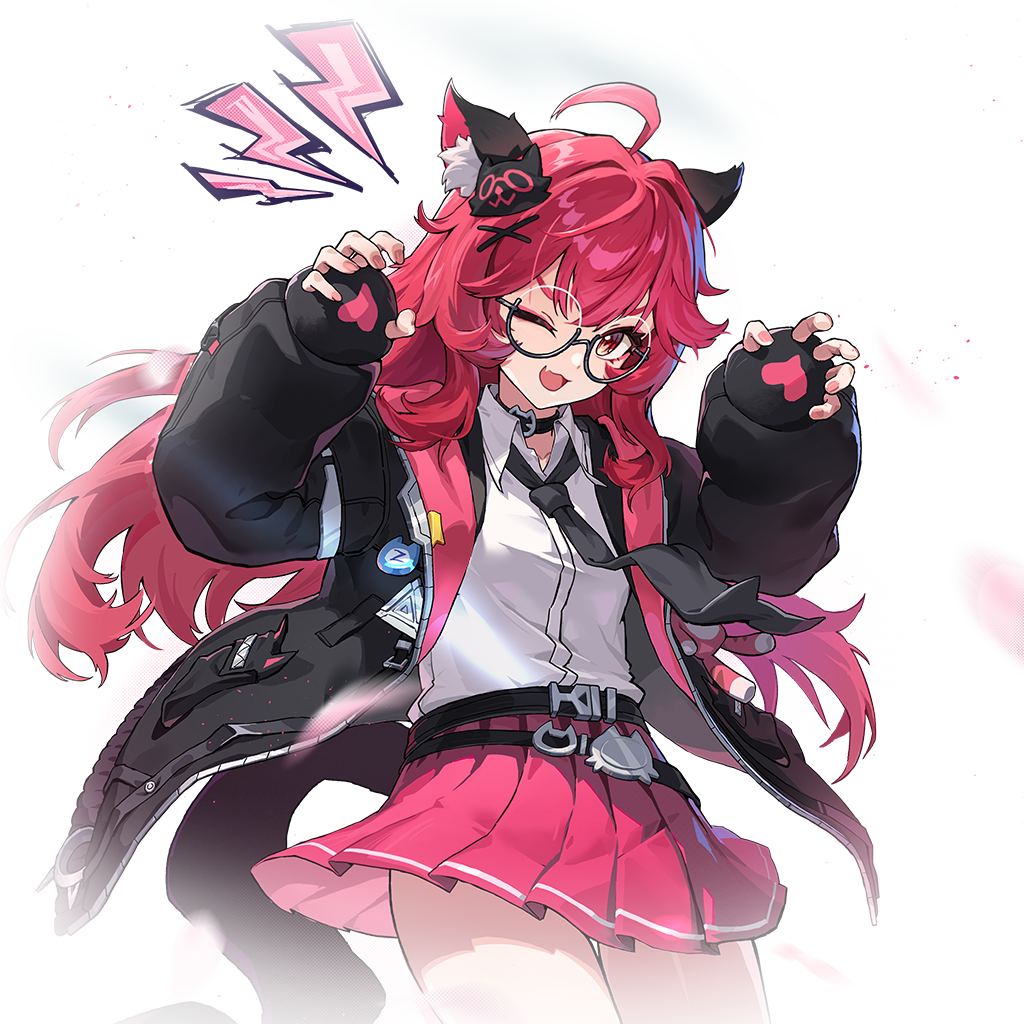
What sets Nanally apart from every other DPS in the game is her automatic follow-up attack system. Even when she is off-field and another character is being controlled, Nanally triggers follow-up Anima strikes whenever her teammates land hits. This means she is always contributing damage, making her the single most impactful character to have on any team.
Nanally is a cat-girl character whose feline traits extend beyond her appearance into her combat style. She attacks with lightning finger strikes, channeling Anima energy through her fingertips to deliver electrifying blows at close range. These strikes are fast, precise, and visually distinctive, with lightning arcs trailing each hit. Her cat-like agility lets her chain attacks into fluid combos that keep enemies locked in hitstun while she dances around them.
She is widely considered the best main DPS character at launch. Multiple beta tests and early tier lists consistently rank Nanally at the top of the damage charts, and her combination of on-field burst, off-field follow-up attacks, and anti-gravity mobility gives her a toolkit that no other character can match in terms of overall value to a team.

Attribute | Detail |
|---|---|
Element | |
Weapon | Fangs and Claws |
Rank | |
Role | Main DPS |
Faction | |
Arc Compatibility | Plasma |
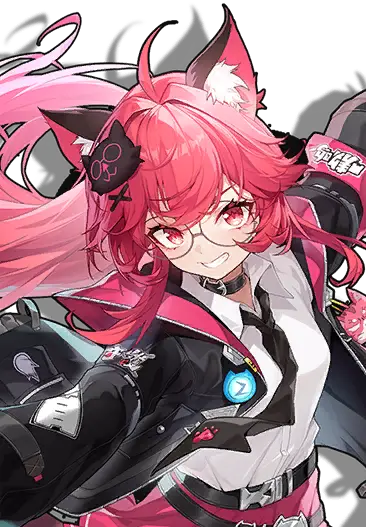
Nanally fights with Fangs and Claws, a weapon that channels her Anima energy through rapid, aggressive melee combos. Her normal attacks are fast multi-hit chains that cover a wide arc in front of her. Each hit deals Anima damage and has a chance to trigger additional claw swipes, giving her combo strings a dynamic, flowing feel.
The defining mechanic of her kit is the automatic follow-up attack system. Whenever a teammate on the field lands a hit, Nanally responds with a follow-up Anima strike from off-field. This happens passively without any player input. The result is that team DPS rises dramatically just by having Nanally in the party, regardless of who is currently being controlled. It is a unique mechanic that no other character in the launch roster replicates.
Her skills enhance her on-field performance with empowered claw combos that deal increased Anima damage and apply additional Anima stacks for elemental reactions. The skill activation also refreshes her follow-up attack timer. This keeps minimal downtime on her passive damage contribution.
One of Nanally's most distinctive traits is her ability to walk on any surface, including walls and ceilings. This anti-gravity movement is not just a cosmetic flourish; it gives her unmatched mobility in both combat and exploration. During fights, she can reposition vertically to dodge ground-based attacks. In the open world, her wall-walking opens access to shortcuts and hidden areas that other characters cannot reach.
This ability ties into NTE's emphasis on creative traversal. While other characters rely on gliders and vehicles for movement, Nanally can simply run up the side of a building and leap to the next rooftop. It makes her one of the most enjoyable characters to control during exploration in Hethereau.
The anti-gravity ability gives Nanally a unique traversal advantage that makes her excellent for both combat and exploration. She can scale vertical surfaces that other characters cannot reach without gliders or special equipment. Cliffs, building walls, and tall structures that would require detours for other characters are simply another surface for Nanally to walk on. This opens up shortcuts, hidden areas, and elevated vantage points that are exclusive to her traversal style.
In combat, the anti-gravity ability allows Nanally to attack from unexpected angles. She can run up a wall to dodge an enemy's ground-based attack, then launch herself back down with a diving strike. This vertical mobility is especially useful against large bosses, as she can climb the boss itself to reach weak points on its upper body that ground-based characters cannot target easily.
Nanally's Ultimate summons "Underboss," a powerful entity that manifests on the field and follows up on Nanally's attacks with devastating additional Anima strikes. During the Ultimate window, every attack Nanally lands is amplified by Underboss's follow-up hits, multiplying her already-high damage output to the highest levels in the game.

The Underboss window is time-limited, so maximizing the number of attacks during this window is key to optimizing her burst damage. Players should use Nanally's fastest combo strings during Ultimate and avoid dodging or repositioning unless absolutely necessary. The damage difference between an optimized Ultimate window and a sloppy one is significant.
Her automatic follow-up system means she deals damage even when off-field, giving teams a permanent DPS boost
During her Ultimate with Underboss, her burst damage output is the highest of any character at launch
High mobility through anti-gravity movement lets her reposition freely during combat
Strong coverage of both AoE and single-target damage depending on combo choices
Works in multiple team compositions thanks to Anima's reaction flexibility
Relatively forgiving to play compared to high-skill-floor characters like Baicang
Nanally's Anima element opens two primary reaction lanes:
Blossom (Anima + Cosmos): Pairs with Cosmos characters to trigger Blossom, which deals bonus AoE damage when both elements react.
Hexed (Anima + Incantation): Pairs with Adler or other Incantation characters to trigger Hexed, debuffing enemies to take increased damage.
The most commonly recommended launch team pairs Nanally with Adler for shields and Hexed reactions, plus Daffodil for break damage utility. This gives the team DPS (Nanally), defense (Adler's shields), and break capability (Daffodil). For players with access to more S-Class characters, replacing Daffodil with Hotori or Sakiri provides additional damage or team buffs.
Nanally is the priority pull target for players who are rerolling at launch. Her impact on team DPS is so large that having her significantly eases progression through all content types. The Scarborough Fair banner system at launch will feature Nanally as a rate-up character.
As the best main DPS at launch, Nanally is the centerpiece around which most teams are built. Her Anima element, lightning finger strikes, and automatic follow-up system mean she benefits from any teammate who can enable reactions or provide buffs. Hathor's energy battery role is particularly valuable, as it lets Nanally access her Underboss summon ultimate more frequently. Haniel's team buffs directly amplify Nanally's already-high damage output, and Jiuyuan's role compression as a DPS/healer means the team can skip a dedicated healer and let Nanally occupy the primary damage slot without compromise.
Her fellow Eibon Antique Shop member Hotori provides Cosmos element coverage for the Blossom reaction, plus the time-freeze ultimate that locks enemies in place for Nanally's full combo chains. A team of Nanally, Hotori, and a flex slot for element coverage or shielding is one of the strongest foundations available at launch.
Nanally is the single highest priority pull at launch. Aim for her on the Scarborough Fair banner before spending pulls elsewhere.
Her follow-up attacks work with every teammate. Even support characters landing hits will trigger Nanally's off-field damage.
During her Ultimate, focus on landing as many hits as possible. Each hit triggers an Underboss follow-up that amplifies your burst window.
Use her anti-gravity movement during exploration to find hidden collectibles and shortcuts that are inaccessible to other characters.
In boss fights, swap to Nanally for Ultimate burst windows and swap back to supports afterward. Her follow-ups will continue contributing damage while off-field.
Pair her with Adler for a low-investment, high-impact core that works from early game through endgame.
See the team building guide for detailed team composition recommendations centered around Nanally.
During the April 18, 2026 Launch Preview Special Program, Nanally was confirmed as the first limited character banner at global launch on April 29, 2026. Her banner opens with server launch and runs on the Scarborough Fair board format with the standard no 50/50 guarantee, meaning the first S-Class character pulled from her limited banner is always Nanally herself.
The banner directly following Nanally's is confirmed to be Hotori's. Players who are saving Solid Dice across both banners benefit from the Scarborough Fair pity carryover, which means any unused pity from Nanally's banner rolls forward to Hotori's limited banner without being reset. A player who pulls Nanally at 60/90 can begin Hotori's banner at 60/90 toward hard pity rather than restarting from zero, making the Nanally-then-Hotori sequence a natural dual-target plan for the first month of live service.
Pull order advice. Rerollers and F2P accounts that land Nanally naturally without hitting her pity should bank the leftover pulls for Hotori's banner, since having both anchors the most common recommended early-game team (main DPS + time-stop control). Accounts that reach Nanally's hard pity and still want Hotori will need to start fresh from zero on the Hotori banner, so choose pull commitment carefully.
When Nanally activates her skill, she enters the Authority state, visualized as a ring of flame around her character model. During this window, Nanally gains a +30% Critical Damage buff to her own outgoing damage. The buff is personal to Nanally and does not apply to teammates, so the optimal play is to land the bulk of her burst damage (empowered basics leading into Ultimate) inside the Authority window rather than before or after it.
Stacking with Awakening ranks. The +30% CRIT Damage during Authority is Nanally's baseline skill effect and stacks multiplicatively with every awakening node she has active. The A5 node Followers Everywhere layers a stacking +2% ATK per Underboss or Authority hit (capped at +20%) on top of the Authority CRIT buff, and the A6 node extends the Authority duration to 15 seconds (or 20 seconds outside combat) so the buff window covers more of her Ultimate rotation. Players running both A5 and A6 see the Authority state transform from a short burst window into the main damage rotation for the character.
Practical rotation. For a maximum-damage burst, the standard sequence is to enter the field, land three to four Fangs and Claws basic attacks to build the Anima stacks a team reaction partner needs, cast skill to enter Authority, cast Ultimate to summon Underboss, then spam basics through the full Authority + Underboss window. Swapping out early cuts short the Authority CRIT multiplier and leaves significant damage on the table, even if Underboss continues its off-field follow-up contributions.
Quick numerical reference compiled from the in-game character profile. Stats listed at character Level 1 represent the base values before Awakening, Console Modules, Cartridges, or Arc weapons modify them.
Attribute | Value |
|---|---|
Birthday | August 20 |
Rarity | S-Rank |
Element | Anima |
Arc Class | Plasma |
Faction | Eibon Antique Shop |
Damage Role | Main DPS |
Nanally's starting numerical baseline before progression systems begin layering bonuses on top.
Stat | Lv.1 Value |
|---|---|
HP | 1320 |
ATK | 80 |
DEF | 75 |
CRIT Rate | 5% |
CRIT DMG | 50% |
Each character is built from a fixed grid of skills, console-side passives, and progression tiers. The counts below describe the maximum slots ever exposed for this Esper, regardless of which ones are unlocked at any given Awakening rank.
System | Slot Count |
|---|---|
Skills | 4 |
Life Skills | 1 |
Awakening Nodes | 8 |
Breakthrough Tiers | 4 |
Nanally is voiced across the three primary localizations supported on launch.
Language | Voice Actor |
|---|---|
English | Brittany Lauda |
Japanese | 竹達彩奈 |
Mandarin Chinese | 宋媛媛 |
These are the in-game skill names for this character. Skill effects are described elsewhere in the article.
Type | In-Game Name |
|---|---|
Basic Attack | Colucci Secret Skill |
Critical Riposte | Can't Touch This! |
Skill | Colucci Howling Technique |
Ultimate | Colucci Ultimate Technique |
Life Skill | Family Business |
Each skill block lists the in-game slot it occupies, the official skill name, and the short description shown on the character menu, followed by the named sub-actions of that skill. Sub-action descriptions are quoted from the in-game tooltip text.
deals Animaanomaly damage。
Sub-Action | Effect |
|---|---|
Basic Attack: Colucci Secret Skill | Bares her fangs and brandishes her claws, performing up to 5 consecutive attacks, dealing Anima DMG. Dodging does not interrupt the combo. |
Basic Attack: Heavy Hitter! | Triggers by holding Basic Attack. Performs up to 3 powerful attacks, dealing Anima DMG. Chains after Critical Riposte and the 1st, 2nd, 3rd, and 5th attacks of Colucci Secret Skill. Dodging does not interrupt the combo. |
Basic Attack: Colucci Secret Gundo | Enters aim mode, dealing 1 instance of single-target Anima DMG to the enemy in the crosshair. |
Basic Attack: Grand Entrance! | Swings her claws in the air and plunges, dealing 1 instance of Anima DMG to an area upon impact. Increases DMG based on fall height, up to 100%. |
Critical Riposte: Can't Touch This! | Triggers when using Colucci Secret Skill after a Critical Dodge. Charges toward the target at full speed, planting one hand on the ground, delivering a roundhouse kick that deals 1 instance of Anima DMG to an area, and reducing Break. |
Hehe, surprise time! Deals 5 instances of Anima DMG to surrounding enemies and wraps herself in Anima Esper Ability, gaining the Ichi-daime's Authority effect. Lasts 12s or until Nanally is switched out. Ends Ichi-daime's Authority early when recast.
Sub-Action | Effect |
|---|---|
— | Hehe, surprise time! Deals 5 instances of Anima DMG to surrounding enemies and wraps herself in Anima Esper Ability, gaining the Ichi-daime's Authority effect. Lasts 12s or until Nanally is switched out. Ends Ichi-daime's Authority early when recast. |
I'm way stronger than them! Deals 7 instances of Anima DMG immediately to surrounding enemies and summons Underboss to fight alongside her. Creates a small pull effect on surrounding enemies with Nanally's attacks while Underboss is active, and coordinates with all of Nanally's attacks to launch strikes, dealing Anima DMG that also counts as follow-up attack damage.
Sub-Action | Effect |
|---|---|
— | I'm way stronger than them! Deals 7 instances of Anima DMG immediately to surrounding enemies and summons Underboss to fight alongside her. Creates a small pull effect on surrounding enemies with Nanally's attacks while Underboss is active, and coordinates with all of Nanally's attacks to launch strikes, dealing Anima DMG that also counts as follow-up attack damage. |
deals Animaanomaly damage。
Sub-Action | Effect |
|---|---|
— | Time to get serious! Charges with a spinning motion, delivering a kick and dealing 1 instance of Anima DMG to an area. |
Blossom Enhancement: Fires 10 Vita Pistils with Vita Bud, reducing the interval between each shot to 1s.
Applies 1 follow-up attack to a single enemy, dealing Anima DMG of 60% ATK whenever any character in the team deals 1 instance of Esper Cycle DMG to an enemy while in Ichi-daime's Authority state. Triggers up to once every 2s.
Nanally has 8 Arcs flagged as a thematic match by the in-game character recommendation panel. Refinement effects below are quoted from each Arc's tooltip and do not represent a tier ranking.
Arc | Rarity | Refinement | Refinement Effect |
|---|---|---|---|
Fluff of Fortitude | 5-Star | Jawbreaker's Candy | Increases the wearer's DMG by 22%. Increases this effect to 28% against enemies with HP below 50%. |
Raging Flames | 5-Star | Headless Rider | Increases Lakshana DMG by 15%. Increases the wearer's Redirect Skill and Ultimate DMG by 10% for 10s after casting Ultimate. Increases the wearer’s Redirect Skill DMG by 5% per cast while active, up to 2 stacks. |
Ready-Ready | 5-Star | Commander Tiger Talisman | Increases ATK by 15%. Increases Basic Attack and Critical Riposte damage by 15% for 15s when casting a Redirect Skill or Ultimate, up to 2 stacks. Grants a Left Tiger Talisman when casting Redirect Skill and a Right Tiger Talisman when casting Ultimate. Unlocks Commander Tiger Talisman if the wearer obtains the other type of talisman within 15s of gaining one. Arc: Commander Tiger Talisman — Increases the wearer's damage to Bosses by 10% for 10s. |
Song of the Whale | 5-Star | Deep Blue Sorrow | Increases ATK by 12%. Increases the wearer's damage to Broken enemies by 12%. Restores 30% HP to the wearer if a Broken enemy is defeated. Triggers at most once every 30s. |
Stellar Veil | 5-Star | Aqua Astra | Increases the wearer's Psyche DMG by 12%. Increases Crit DMG dealt by 2% for 5s when dealing Psyche DMG, up to 10 stacks. Triggers at most once every 0.1s. |
Drawn Blade | 4-Star | Crimson Hexblade | Deals additional Incantation DMG equal to 200% of ATK when the wearer triggers a Parry Attack. |
Oraora! | 4-Star | Ora Puncher | Increases the wearer's Basic Attack DMG by 2% for 10s after each Basic Attack, up to 10 stacks. Each stack lasts independently. |
Us. | 3-Star | Protocore | Increases the wearer's Basic Attack damage by 12%. |
Ascension lifts Nanally's level cap one step at a time. Each phase requires the listed Coins (the world currency) plus a fixed list of materials. World Level shown is the minimum required to access the breakthrough.
Phase | Lv Cap | World Lv | Coins | Materials |
|---|---|---|---|---|
Phase 1 | 30 | 1 | 25,000 | Fading Silhouette x5 |
Phase 2 | 40 | 2 | 50,000 | Fading Silhouette x12, A Page from Delusion's Shore x2 |
Phase 3 | 50 | 3 | 75,000 | Blurred Silhouette x6, A Page from Delusion's Shore x8 |
Phase 4 | 60 | 4 | 100,000 | Blurred Silhouette x12, A Page from Delusion's Shore x16 |
Phase 5 | 70 | 5 | 125,000 | Chaos Silhouette x6, A Page from Delusion's Shore x24 |
Phase 6 | 80 | 6 | 150,000 | Chaos Silhouette x9, A Page from Delusion's Shore x36 |
Nanally's base HP, ATK, and DEF at key level milestones. These numbers are the raw character base values before Awakening, Console Modules, Cartridges, or Arc bonuses modify them.
Level | HP | ATK | DEF |
|---|---|---|---|
Lv 1 | 1,056 | 40 | 60 |
Lv 10 | 2,006 | 76 | 114 |
Lv 20 | 3,062 | 116 | 174 |
Lv 30 | 5,174 | 196 | 294 |
Lv 40 | 7,286 | 276 | 414 |
Lv 50 | 9,398 | 356 | 534 |
Lv 60 | 11,510 | 436 | 654 |
Lv 70 | 13,622 | 516 | 774 |
Lv 80 | 15,734 | 596 | 894 |
Awakenings unlock through duplicate copies of the character. Each tier from A1 to A6 grants a named upgrade.
Tier | Awakening Name | Effect |
|---|---|---|
A1 | Gang Formation | Grants Nanally 2.5 Ultimate Energy for each follow-up attack she performs. Triggers at most once every 1s. |
A2 | Second Member | Underboss lasts 3s longer. |
A3 | Call Me the Boss | Applies 1 follow-up attack to a single enemy, dealing Anima DMG of 50% ATK whenever Nanally deals damage to an enemy while in Ichi-daime's Authority. Triggers up to once per second. |
A4 | Not a Troublemaker | Underboss deals 100% increased damage. |
A5 | Followers Everywhere | Increases Nanally's ATK by 2% for each follow-up attack she performs, up to 20%. Disappears when Nanally leaves the battlefield or exits combat. |
A6 | Because We're Family | Extends the duration of Ichi-daime's Authority state to 15s, and further extends it to 20s when out of combat. |
Resonance bonuses unlock at specific Awakening milestones, not from additional duplicates. R1 activates when the character reaches A3, and R2 activates at A6. Both stack on top of the named Awakening node effects.
Tier | Resonance Name | Unlocks At | Effect |
|---|---|---|---|
R1 | Colucci Secrets Part 1 | A3 | Increases the skill level of Colucci Secret Skill, Colucci Howling Technique, and Colucci Ultimate Technique by 1. |
R2 | Colucci Secrets Part 2 | A6 | Increases Nanally's damage by an additional 15%. |
Each character has a Console passive that activates when the matching Module type is equipped on their Console grid. This is a flat passive that scales linearly with the count of matching Modules and is the strongest reason to commit to a single Module type when building this Esper.
Type II Specialization: Increases CRIT Rate by 6% for each Type II Module equipped.
Life Skills are out-of-combat benefits that activate while the character is assigned to the relevant non-combat activity (Eibon Antique Shop owner duty, Sea Angler trips, City Tycoon shifts, and similar passive systems). Each level unlocks an additional or stronger benefit and stacks with the previous levels.
Level | Effect |
|---|---|
Level 1 | Nanally increases dish prices by 0.2 Fons for every Main Dish tag on dishes. |
Level 2 | Nanally reduces ingredient consumption rate by 1%. |
Level 3 | In Owner's Selection, hitting customers with the hammer grants 115% of the current dish price. |
Level 4 | Nanally reduces ingredient consumption rate by 1%. |
Level 5 | Nanally increases dish prices by 0.3 Fons for every 2 Main Dish tags on dishes. |
Language | Voice Actor |
|---|---|
English | Brittany Lauda |
Japanese | 竹達彩奈 |
Chinese | 宋媛媛 |
Korean | 강새봄 |
