Overview
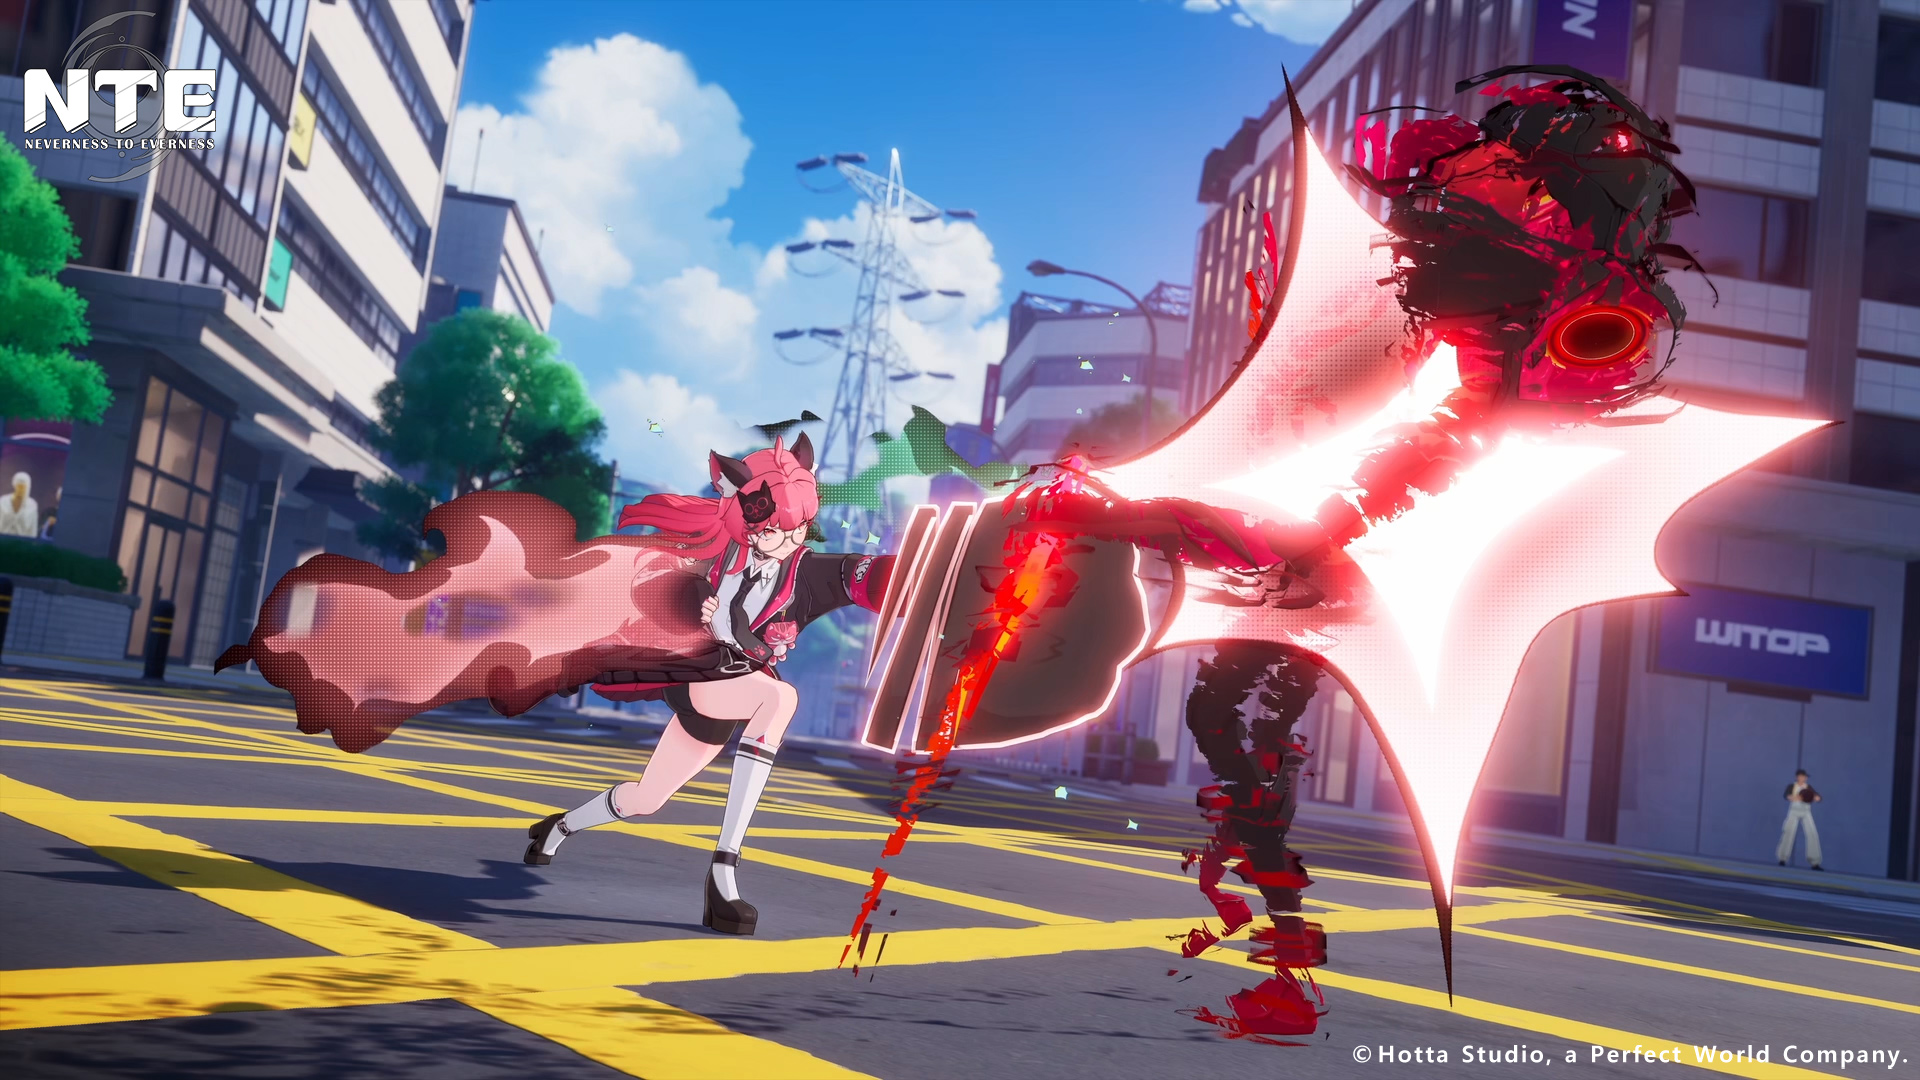
Parrying is one of the core defensive mechanics in Neverness to Everness. It rewards precise timing with powerful combat benefits, including instant Esper Cycle Meter charge, stagger contribution, and animation cancellation. When an enemy begins a telegraphed attack, a parry circle appears on screen. The player must press the parry button just as the shrinking outer ring aligns with the inner circle. A successful parry deflects the incoming attack and triggers a brief slow-motion effect that confirms the timing.
Parrying is not just a defensive convenience; it is a fundamental part of the combat system's offensive loop. A perfect parry instantly fills the active character's Esper Cycle Meter, which means one well-timed parry can set up an immediate swap reaction without needing to build meter through normal attacks. In high-level play, parry timing is often the difference between a smooth, fast clear and a drawn-out struggle.
Parry Types
NTE offers five distinct parry types, each triggered under different combat conditions. Mastering all five gives you the flexibility to parry in almost any situation.
Parry Type | Trigger Condition | Notes |
|---|---|---|
Normal Attack Parry | Parry during a normal attack sequence | The most common parry type. Available at any point during your normal attack chain. Has a relatively generous timing window, making it the best starting point for learning. |
Plunge Attack Parry | Parry during a plunge or aerial attack | Triggered when you are in the air and an enemy attacks. Useful during aerial combat sequences and against enemies with ground-level AoE attacks. |
Skill Parry | Parry using a skill activation | Activating a skill at the right moment counts as a parry. This lets you simultaneously deal skill damage and deflect an incoming attack. |
Normal Swap Parry | Parry when swapping to another character | Swapping characters at the right time deflects the attack. The incoming character enters the field with the parry already complete. |
Esper Cycle Swap Parry | Parry during an Esper Cycle swap | The most advanced parry type. Executing an Esper Cycle swap at the moment of an enemy attack combines the parry, the meter-charged swap reaction, and a defensive deflection into a single action. |
Timing
The parry window is tight but consistent across all enemy attack types. The visual indicator is straightforward: a circle appears around your character, with an outer ring that shrinks inward. You need to press the parry input when the outer ring lines up with the inner circle. The window lasts for a brief fraction of a second, rewarding practice and pattern recognition.
Different enemies telegraph their attacks at different speeds. Regular enemies tend to have slower, more readable wind-ups that give you plenty of time to react. Boss enemies often mix fast jabs with slow sweeps, requiring you to learn each attack pattern individually. Some bosses also use multi-hit combos where each strike can be parried separately, rewarding sustained attention.
If you are new to the parry system, start by practicing Normal Attack Parries against regular enemies in the open world. Once you can consistently nail the timing on basic attacks, move to Skill Parries and Swap Parries. The Esper Cycle Swap Parry should be attempted last, since it requires you to manage meter, timing, and character selection simultaneously.
Rewards
A successful parry delivers several immediate benefits that feed into the game's offensive loop.
Reward | Description |
|---|---|
Instant Esper Cycle Meter fill | The most significant reward. A perfect parry completely fills the active character's Esper Cycle Meter, allowing an immediate swap reaction without needing to build meter through sustained attacks. |
Stagger contribution | Parries contribute to the enemy's break meter (stagger bar), pushing them closer to a vulnerable stagger state. Against bosses, consistent parrying is one of the fastest ways to force a stagger window. |
Attack animation cancellation | A successful parry interrupts the enemy's current attack animation, potentially preventing follow-up hits in a combo chain. This is especially valuable against bosses who chain multiple attacks together. |
Positioning advantage | After a parry, both you and the enemy reset to neutral positions. This gives you a brief moment to reposition, swap characters, or begin a counter-attack sequence. |
Tips and Strategies
Strategy | Description |
|---|---|
Master Normal Attack Parry first | It has the most generous window and is available in the widest range of combat situations. Once it becomes muscle memory, the other parry types will feel much more natural. |
Use parries to charge the Esper Cycle Meter during boss fights | Boss encounters are long, and efficient meter generation is key. A single parry fills the meter instantly, which is far faster than building it through normal attacks alone. |
Combine parries with the stagger system | Parries push the enemy's break meter forward. When the enemy staggers, swap to your highest-damage character for a burst window. The parry-to-stagger-to-burst cycle is one of the most effective damage patterns in the game. |
Learn boss attack patterns | Every boss has a fixed set of attack animations with consistent timings. Spend your first few attempts on a new boss learning which attacks are parryable and what their wind-up looks like. |
Do not panic-parry | Mashing the parry input will cause you to miss the window more often than not. Wait for the visual cue, then press once with deliberate timing. |
For more on how parrying integrates with swaps and reactions, see the Esper Cycle System article. For details on the break mechanic, see the Stagger System article. For general combat mechanics, see the Combat System overview.
Parry Among the Core Combat Verbs
Parrying sits alongside four other foundational combat actions in Neverness to Everness. The full set of core combat verbs a player can perform during any encounter is skills, ultimates, perfect dodges, parries, and elemental reactions. These are the five tools that drive almost every offensive and defensive decision, from quickly clearing open-world mobs to grinding through High Risk Anomaly boss fights. Treat parrying as one option in that toolbox, not as a niche defensive trick.
Each verb has a different risk profile. Skills and ultimates are strong but gated by resource or cooldown. Perfect dodges are safe but produce less meter payoff than a parry. Elemental reactions depend on which Esper pairs you have on field. Parries are the only verb that pays back a full Esper Cycle Meter on a clean read, which is why high-level players prioritize parry timing over pure damage uptime once they have memorized a boss's wind-ups.
Core Combat Verb | Primary Use | Where Parry Fits |
|---|---|---|
Skills | Deal focused damage and apply on-hit effects tied to each character. | A Skill Parry can overlap a parry with a skill activation, turning one input into damage plus a deflection. |
Ultimates | High-cost burst windows used for boss pressure and stagger capitalization. | Parries feed Esper Cycle meter that, through swap reactions, helps set up ultimate windows faster. |
Perfect Dodges | Safe reaction to unreadable or unparryable attacks. | Dodges preserve your position; a parry trades a tighter window for full meter refund instead. |
Parries | Deflect an incoming attack and instantly charge the active character's meter. | Anchor verb for the swap-cancel loop described below. |
Pair two adjacent Esper elements on the wheel to produce extra damage effects. | Parries themselves do not cause reactions, but the swap they enable is the fastest way to trigger a two-character reaction mid-fight. |
The combat system as a whole has been described as safe relative to the more novel open-world systems in the game, meaning it borrows familiar verbs rather than inventing brand-new ones. That does not make parry any less important; if anything, the safe framing is what makes parrying the skill-expression ceiling of moment-to-moment play. A player who masters parry timing pulls significantly more out of an otherwise conventional verb set.
Use in Switch-Cancel Setups
NTE combat is built around a four-character squad with heavy swap usage. Dodges and parries are the two actions that most cleanly chain into a character swap, and parries in particular enable a pattern often called a switch-cancel setup: parry an enemy attack on the on-field character, then immediately swap to a second character whose Esper passive benefits from the meter you just gained.
The loop works because a perfect parry fills the active character's meter in a single beat. That full meter unlocks an Esper Cycle swap, which brings the incoming character onto the field with an enhanced entry action. If the two characters you are swapping between sit next to each other on the Esper wheel, the swap also sets up the shared reaction between their elements on the very next hit.
Practical switch-cancel flow:
Start the encounter with the character best at building pressure and baiting a boss telegraph.
Wait for a parryable wind-up, then execute a Normal or Skill Parry to refund your meter instantly.
Immediately perform an Esper Cycle swap to the second character whose passive enhances the reaction you want.
Use the incoming character's swap-cancel window to apply a reaction element, triggering the corresponding two-character elemental reaction.
Chain another parry or perfect dodge on the next enemy action to set up the third character, repeating the loop.
Switch-cancels are also how three-character Trio Reactions become practical. Stacking two parry-driven swaps back to back has all three squad members contribute an element in a short window, which is the shortest route to the three-way payoff on a cluttered boss arena. Skipping the parry step forces you to build meter through normal attacks, which slows the loop enough that the third element usually times out before it can connect.
Keyboard vs Controller Timing (Beta Note)
Input feel differs noticeably between keyboard and controller in the third closed beta. Keyboard input feels stiffer for both dodges and parries, with the window for a clean parry noticeably harder to read. Swapping to a controller smooths that timing out; the same attacks that felt inconsistent on keyboard read more predictably with analog input.
If you are practicing parries in the beta, the following notes reflect what most testers have reported.
Input | Parry Feel | Recommendation |
|---|---|---|
Keyboard and Mouse | Stiffer timing for both dodges and parries. The parry window feels harder to line up consistently against fast boss wind-ups. | Practice Normal Attack Parries on open-world enemies first. Avoid introducing Skill or Esper Cycle Swap Parries until the basic timing feels reliable. |
Controller | Smoother, more readable timing. Analog stick inputs and mapped face buttons make dodge and parry commits feel less abrupt. | Strongly recommended for boss fights and High Risk Anomaly encounters, where tight parry windows are most punishing. |
This is a beta observation, not a permanent judgement about the game. Input polish is one of the items being iterated on ahead of launch, so keyboard parry feel may improve. For now, if you have access to a controller, use it for any content where parry consistency matters; if you are keyboard only, weight your early learning toward the more forgiving parry types.
Parry Opportunities on Bosses
Boss encounters are where parrying pays off the most. The game's standout boss fights are one of its highlights, with a larger-than-usual variety of attack patterns, telegraphs, and multi-phase behaviors. Because each boss has its own set of readable wind-ups, parry opportunities exist across almost every notable encounter rather than being limited to a handful of set-piece fights.
A few patterns show up across many of these fights:
Slow sweep into fast jab. Many bosses alternate a slow, wide sweep with a faster punch or stab that follows on the same beat. The sweep is the easier parry read; learning to parry the sweep first often exposes the timing of the jab that follows.
Multi-hit combo chains. Some bosses use strings of three or more hits where each strike can be parried separately. Chaining parries through such combos stacks meter generation and pushes the break meter hard, frequently forcing a stagger window inside one combo.
Telegraphed burst. Scripted "big hit" attacks are marked with exaggerated wind-ups. These are the most rewarding parries because they are easy to read and because surviving them usually interrupts a boss's most dangerous animation outright.
Unparryable AoE. A small subset of boss attacks are designed to be dodged rather than parried. Wide arena-filling AoE or grab attacks usually fall into this bucket; attempting to parry them wastes the window and leaves you open to the follow-up.
Because the parry payoff is an instant meter refund, a boss fight that lets you parry two or three times per phase is effectively giving you two or three free swap windows in that phase. Use them to rotate between characters whose Esper passives enhance whichever elemental reaction you are comfortable triggering, then cash the stagger window when the boss's break meter fills. Combined with the switch-cancel flow above, this turns parrying into the primary damage lever on most boss fights, well beyond its pure defensive value.
For further reading on how parries fit into the broader combat structure, see the Combat System overview. The Esper Cycle System article covers the meter and swap mechanics that parries feed into.